-
Astoria at Home – Cookbook
Here’s something fun AND useful. Curated by and for Astorians, the Astoria at Home cookbook celebrates the neighborhood’s vibrant food scene while raising money to support the Astoria Mutual Aid Network.
QED Astoria has a cocktail recipe in here as well as a story written by me about the time an NBC Sports announcer dissed my neighborhood during the NYC Marathon broadcast and my subsequent reaction to his nasty comments.
Order your digital download here & proceeds will benefit the Astoria Mutual Aid Network.
-
Dutch Mama
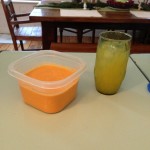
From my storytelling pal, Tracey Miller Segarra, comes this easy & delicious egg quiche-type thing. It was so good and it actually tastes a lot like the base of a Panera egg soufflé. I’ve been making a knock-off version for years but it’s fairly labor intensive. This, however, took hardly any time at all. So, I’ll be tweaking that recipe a bit and will report back. Now, for the Dutch Mama…
- Heat oven to 425 degrees and put an oven-safe pan inside while the oven is heating up.
- 3 eggs
- 2 egg whites
- 1/2 cup milk
- 1/2 cup flour
- 1 tbsp sugar
- 1/8 tsp salt
Mix wet ingredients and then add in dry and stir til it’s blended together.
Put a big pat of butter into the hot pan, swirl around and let it evaporate in the oven until it forms a glaze on the bottom.
Pour the mixture into the pan and cook for 15-17 minutes (until it rises and looks like the photo.Take out of oven, sprinkle with powdered sugar and voila! Yum! I ate half in one sitting and it was delicious fresh from the oven. I saved the other half and heated up in the microwave for breakfast and it held up better than I expected. Now that I know that, I will definitely tweak the Panera soufflé recipe as I like to make 4 or 6 soufflés in advance and have them as an easy, ready-to-heat-and-eat option.
-
Strawberry Ice Cream – No Eggs! No Cooking!
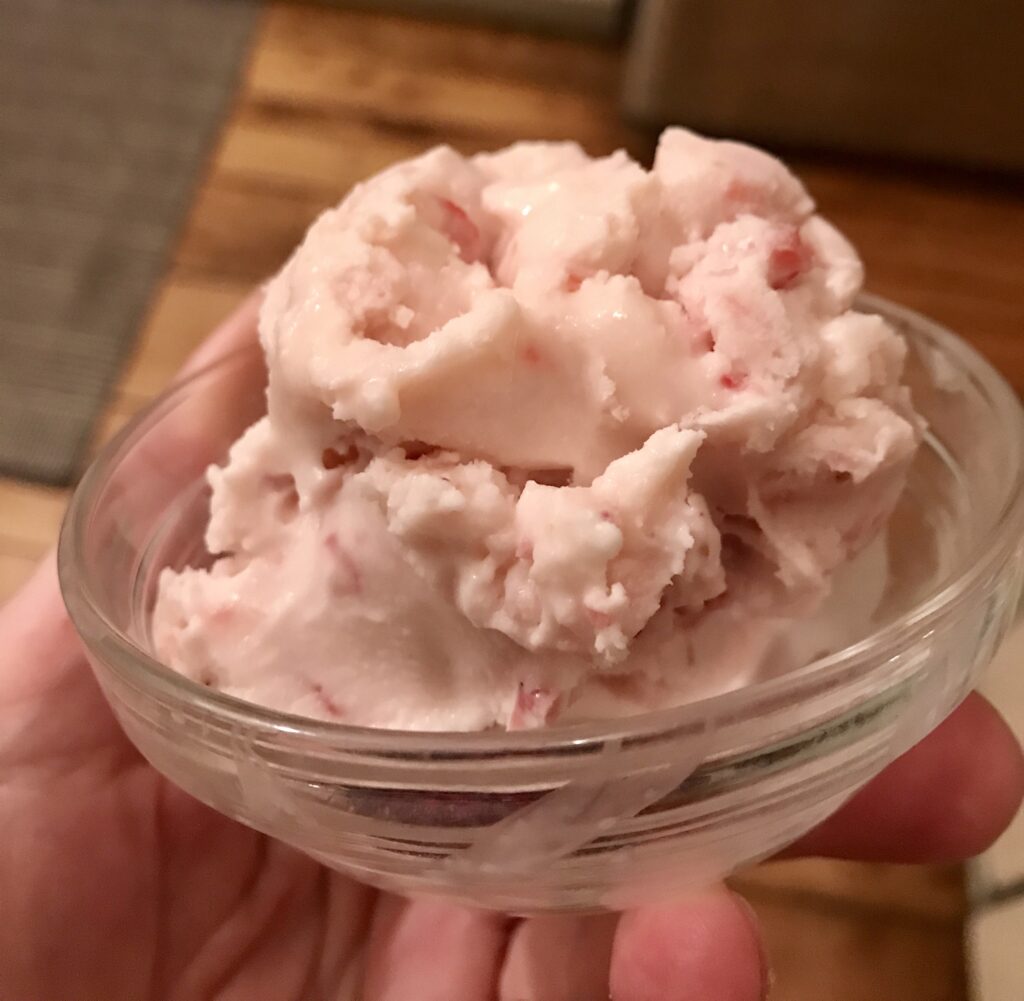
Creamy & sweet! Easy, like I like it! No eggs, no cooking, just some strawberries and cream!
- 1 cup whole milk
- 1 cup heavy cream
- 1/2 cup white sugar
- Dash of salt
- 1 tspn vanilla extract
- 1 cup mashed fresh strawberries
Mix it up and use your ice cream maker and you’re done. So easy. So good!
-
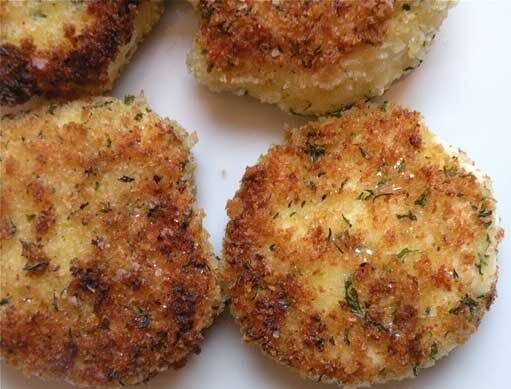
Fried Goat Cheese
Easy, quick & delicious! In addition to the ingredients, you’ll need three bowls and a plate with some paper towels to soak up the oil after frying…
- Goat cheese log, freeze 15 minutes before cutting
- 1/2 cup panko breadcrumbs
- 1/2 cup pecans, finely chopped
- 1 tspn each thyme & parsley
- 1/2 tspn garlic powder
- 1/4 tspn fresh ground black pepper
- 1 teaspoon salt
- 1 egg, beaten in a separate bowl & left by itself (Poor egg!)
- 1/4 cup all-purpose flour (also alone in it’s own bowl)
- vegetable oil (for the pan for frying)
- Freeze the cheese log for about 15 minutes to firm it up before cutting.
- In one bowl, combine panko breadcrumbs, pecans, thyme, garlic powder, black pepper and salt in a small bowl. The beaten egg is in a separate bowl and the flour is in it’s own separate bowl.
- Remove the cheese from the freezer. Slice the goat cheese into ½” rounds. You can reshape the cheese easily after it’s been dipped in flour.
- Dip the cheese in the flour, then egg, and then panko mixture and coat both sides.
- In a small frying pan, add enough oil to reach halfway up the goat cheese. Heat the pan over medium-high heat
- Carefully place the cheese into the pan and cook until golden brown which is pretty quick…only about 30 to 45 seconds. Flip it and fry the other side.
- Drain the fried cheese on a paper towel to remove any excess oil.
- It holds well and stays crisp for at least an hour if you want to prepare it ahead of time.
-
Easy Banana Bread
 We forgot to pack up some bananas the last time we were here at the Rock House, so when we got back they were pretty overripe (not rotten or covered in fruitflies thankfully) and perfect for making some homemade banana bread. Here’s the recipe I used, though I wish I had some pecans or walnuts or something to add to it. Next time. Meanwhile…
- 3 ripe mashed bananas
- 1 cup white sugar (I use a Splenda/Sugar for baking mix)
- 1 egg
- 1/4 cup melted butter
- 1 1/2 cups flour
- 1 teaspoon baking soda
- 1 teaspoon salt
- Preheat oven to 325 degrees F. Grease a 9×5-inch loaf pan.
- Combine bananas, sugar, egg, and butter together in a bowl. Mix flour and baking soda together in a separate bowl; stir into banana mixture until batter is mixed then stir in salt . Pour batter into the prepared loaf pan.
- Bake about 1 hour or until a toothpick inserted in the center of the bread comes out clean.
Not really optional:
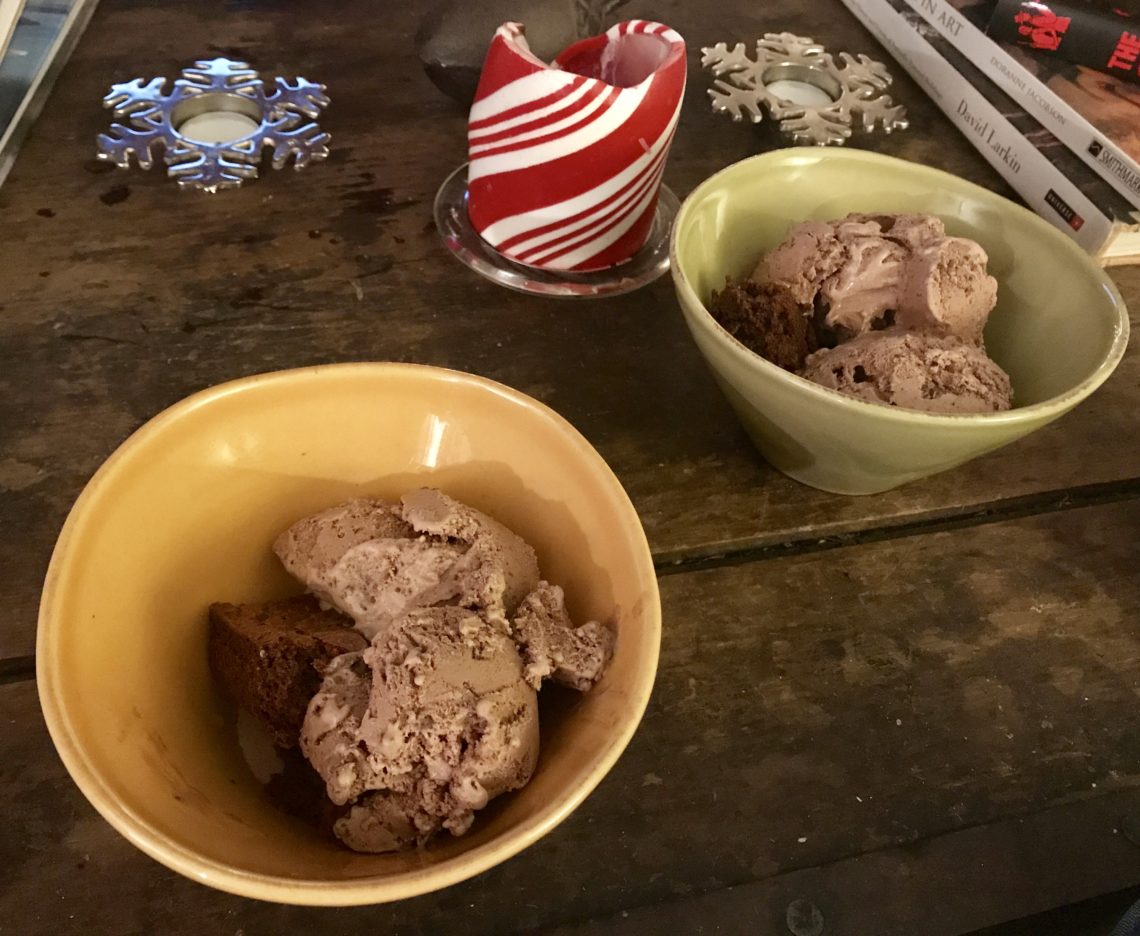
Serve warm with homemade vanilla ice cream. -
Easy (No Cooking!) Ice Cream Recipes
As a New Yorker purchasing a novelty kitchen item like an ice cream maker isn’t the wisest move. But I had been diagnosed with cancer and said to hell with it. It wasn’t on my “bucket list” (is making homemade ice cream on anyone’s bucket list?), but I *had* always wanted my own ice cream machine. Everything is trash and we all die anyway and none of this really matters, so I’m gonna make some damn ice cream. (It was a great summer. /sarcasm)
After some online research, I got a Cuisinart 1.5 Quart Frozen Yogurt-Ice Cream Makerin white, though they do make other fun colors. (UPDATE! After a few years, my Cuisinart died so I got a KitchenAid). I quickly realized that many ice cream recipes call for cooking. What? No. No, no, no, no, no, no, no. I just want to make sweet creamy stuff and freeze it and eat it all in one sitting.
So I found the *perfect* no-cook recipe for vanilla, chocolate chip, cookies & cream, mint, coconut and other concoctions. It’s dangerously easy to make with 4 simple ingredients. Not chocolate, though. Don’t fret! I found a great chocolate recipe also included below. But first the super easy adaptable one from All Recipes billed as a Mint Chocolate Chip, but it can easily be adapted to any flavor combo you want.
It takes less than 3 minutes to mix up the following in a bowl then dump into your machine. That’s it. Like I said, dangerously easy…

* I’ve mixed and matched extracts up to about 2 to 3 teaspoons. Coconut vanilla, coffee and raspberry, you name it. Chocolate is really the only thing I couldn’t make work with this. Cookies and Cream made with crushed up Oreos is probably the best version ever. It’s shamefully good.
For chocolate…I tried a few until I finally landed on *the one*. No cooking at all and a damn fine creamy chocolate flavor.

Get a bowl. Stir together the sugar and cocoa. Add the egg yolks and blend with a mixer. Add cream a little at a time, beating as you go. Put the mix in the refrigerator while you grate the chocolate chips in blender or food processor or whatever, until fine. Stir into cream mixture.
 Use your ice cream maker to freeze it and let it ripen about 8 hours or more. You can eat it earlier…it’s just better after time.
If you have any qualms about raw eggs, then skip this recipe but the eggs make it so much creamier and richer.
That’s it! The hardest part is finding a spot to store the machine when not in use. (UPDATE! I keep the KitchenAid bowl in the freezer the KitchenAid itself lives on our counter.) Well that and not eating gallons of ice cream every day. But I have made a delicious low fat, sugar free frozen yogurt and a sorbet, so there are healthier options, too. So get yourself a machine or ask your Santa to deliver one to you this Christmas. You’re welcome!!!
-
Jalapeno Lime Cilantro Marinade
I found this recipe for a tasty jalapeño lime cilantro marinade but can’t find the source. Saving here for future use. Good for 4 chicken breasts. Ingredients:
- 2 limes, juice and zest or 1/4 cup lime juice
- 1 tablespoon – ¼ cup olive oil
- 2 tablespoons cilantro, chopped
- 1 clove garlic, grated
- 1 jalapeno, finely diced (optional)
-
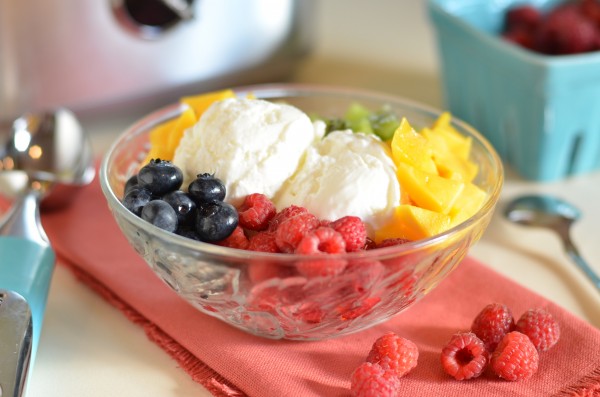
HOMEMADE PINKBERRY FROZEN YOGURT
 Yields: 4 servingsINGREDIENTSFor the frozen yogurt:
- 3 cups non-fat or reduced-fat Greek yogurt
- 1 cup skim milk
- 1/3 cup sugar
- 2 Tbsp lemon juice (from 1/2 a lemon)
For serving:- assorted chopped fresh fruit (or your favorite froyo toppings)
INSTRUCTIONS- Freeze the bowl of your ice cream maker according to manufacturer instructions.
- Whisk all frozen yogurt ingredients together in a large bowl. Pour into the bowl of your ice cream maker and churn until frozen. (This takes about 15 minutes in mine.)
- Scoop immediately for soft-serve (delicious!) or store in a covered container in the freezer. My preference is to place in the freezer for 30-60 minutes before serving to harden the yogurt up just a bit and ensure that it doesn’t melt immediately. Top with fresh fruit and enjoy!
-
Skinny Mint Chocolate Milkshakes
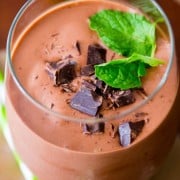 Thick & creamy mint chocolate milkshakes without all the calories and fat. Only 5 simple ingredients! Add chocolate protein powder and/or a handful of spinach if you like…so many ways to tweak it.
Ingredients for 2 servings:
- 1 large frozen very ripe bananas, peeled & sliced
- 2 heaping Tablespoons unsweetened cocoa powder
- 1/2 cup skim milk
- 1/2 cup nonfat plain Greek yogurt
- 1/8 teaspoon peppermint extract
Directions:
- Make sure you have a strong, powerful blender that will blend up the frozen banana.
- Add all of the ingredients to the blender, in the order listed, and blend until thick, creamy, and smooth – about 3 minutes.
Additional Notes:
- The milk can be any milk you like: skim, 1%, 2%, almond, soy, coconut.
- The yogurt can be any yogurt you like: vanilla Greek yogurt, plain Greek yogurt, plain yogurt, vanilla yogurt. Non-fat or low fat. Same for milk, of course.
- Add more milk to thin it out. You can always add more peppermint extract and/or cocoa powder for a stronger minty and/or chocolate taste.
-
Chocolate Peanut Butter Protein Smoothie
I’ve been making this single-serving of a crazy flavorful, low-fat, high protein smoothie for myself and double it if Christian is home.
Ingredients:
- 1/2 banana, peeled, sliced, and frozen
- 1 Tablespoon unsweetened cocoa powder (I sometimes skip this and just make it PB&B.)
- 1/2 cup non-fat, plain Greek Yogurt
- 1/2 cup skim milk
- 1 Tablespoon Splenda, honey, maple syrup, or agave…whatever sweetener you like. (I actually stopped adding Splenda as an overripe banana is plenty sweet for us.)
- 1 Tablespoon peanut butter (Any kind you like but we prefer all natural, i.e., the only ingredient listed is peanuts.)
Directions:
- Make sure you have a strong, powerful blender that will blend up the frozen banana.
- Put all of the ingredients into the blender, in the order listed, and blend on high until thick and smooth.
- Drizzle glass with 1 teaspoon of chocolate syrup (optional) and enjoy!
Additional Notes:
If you prefer a less sweet smoothie, you can leave out the honey. Add more peanut butter for a stronger peanut butter taste. Add more milk to make the smoothie thinner, if desired. Add 1 cup of your favorite greens for added nutrition. So many ways to play around with this simple smoothie!
-
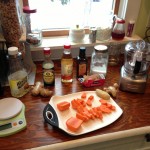
Baked Tilapia in a Lemon Butter Caper Sauce
I’ve never been much of a fish eater (except that one time in college!) but lately I’ve been eating more fish tacos, tuna, catfish and tilapia than all my years of life combined. Note, they’re all mild flavored fish. I still can’t stand the smell and taste of fishy fish and tilapia is about as mild as they come.

This recipe serves two and takes 20 minutes, tops, from the fridge to your belly.
INGREDIENTS:
2 tilapia fillets
2 tablespoons melted butter (I use Land O Lakes Light Butter for an even healthier dish)
2 tablespoons lemon juice
Garlic salt
Capers
OreganoDIRECTIONS:
– Place tilapia in an ungreased baking pan. I line my pan with foil to avoid cleanup.
– Combine the butter & lemon juice and pour over the fillets. Sprinkle with capers, oregano and garlic salt to taste. Throw on minced garlic or powder if you want more garlic flavor.
– Bake uncovered at 425° for 10-15 minutes or until fish flakes easily with a fork. I always go for the full 15 minutes because I don’t want to see the fish again anytime soon, ifyaknowwhatImean.Bam. That’s it. Seriously. That’s it.
In this photo, I’ve paired it with roasted asparagus, onions and cherry tomatoes drizzled with lemon juice and a dusting of parmesan cheese. Ignore the pink, flowery plate. They were left by the previous owners and we never bothered buying dishes of our own.
-
Mediterranean Orzo Salad
Ingredients:
½ lb orzo
3 tbsp extra virgin olive oil
6 oz pitted & sliced kalamata olives
4 oz diced sundried tomatoes (dry or jarred)
8 oz cubed or crumbled feta
2 oz toasted pine nuts
handful of fresh diced parsley
salt + pepper to tasteBring water to a boil, enough to cook your orzo pasta. Meanwhile, slice your kalamata olives in half, cube your feta, and dice your sundried tomatoes. Toast your pine nuts in the oven for a few minutes at 375 degrees, it enhances their flavor. Chop a small handful of parsley, and set all aside.
Cook your orzo according to the directions on the box, strain, and place in a bowl. Immediately pour the EVOO over the orzo to keep it from sticking, then stir it all around. Add the feta, kalamata olives, sundried tomatoes, pine nuts and parsley on top. Toss the ingredients together, then add freshly cracked black pepper and salt to taste. Chill for an hour, serves 6 to 8 people.
-
Edible and Audible Jambalaya
Jambalaya and Crawfish Pie and Fillet Gumbo! Ahhh, Hank Williams, Jr. and a pot o’ jambalaya are making me happy tonight. When folks think of jambalaya and other Cajun delights, they don’t usually think of some girl in the sticks of Texas. But before we moved into the shed on Boars Head we rented a house along a bayou in Houston.
Many an afternoon was spent trawling the bayou in search of crawdads. You wouldn’t have caught me *eating* one back then, but who doesn’t love to pull up a net and see a good catch o’ the day? We could sell those suckers, too! Throw in a pitcher of fresh Kool-Aid & crawdad stands could yield a pretty penny.
Thanks to this recipe from the Food Network, I was able to enjoy a taste of home. It’s an easy and yummy recipe with just a little bit of kick. Swap out white rice for whole grain without sacrificing a lot of taste and you’ve got a healthier dish. Throw in some more cajun seasoning and/or Tobasco sauce for a little extra spice.
This yields a lot at 2.5 pounds of meat plus all the fixings. The site said 4 servings but I don’t know what kind of monster chained in the basement they’re feeding. I’d say this should yield about 8 bowls.
1 pound boneless skinless chicken breasts, cut into 1-inch cubes
1/2 pound andouille sausage, diced
1 (28-ounce) can diced tomatoes
1 medium onion, chopped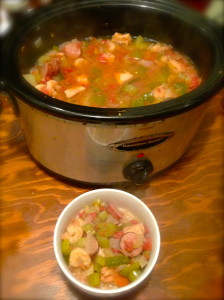 1 green bell pepper, seeded and chopped
1 stalk celery, chopped
1 cup reduced-sodium chicken broth
2 teaspoons dried oregano
2 teaspoons Cajun or Creole seasoning
1 teaspoon hot sauce
2 bay leaves
1/2 teaspoon dried thymeFor later:
1 pound frozen peeled and cooked shrimp, thawedAnd even later:
2 cups cooked riceDirections
Throw everything except the shrimp and rice in a slow cooker. Cook on LOW for 7 hours or on HIGH for 3 hours. Stir in the thawed shrimp, cover and cook until the shrimp is heated through. That should only be about 5 minutes, but I cooked for another hour because I once got food poisoning from shrimp. Once. Discard bay leaves and spoon mixture over cooked rice.Bon appétit, mon chérie!
-
Zipzicle Review & Give-Away
Here at the Crews-Finnegan abode, we’re a mostly sugar-free household, so I’m always on the lookout for ways to make snacks that also satisfy the sweet tooth. Entrez le Zipzicle!
These nifty little plastic pouches can be used to make healthy, all natural, sugar free ice pops & other frozen treats. But let’s be honest, the way I found out about them was for boozing. My niece (Technically, my ex-niece-in-law but who’s counting and how annoying is that to type out?) posted on Facebook about how she was enjoying some potent margarita ice pops. I babysat this chick and she’s having all the fun? Nuh uh. This will not stand.
I decided to make my own. But how? A quick Google search led me to find Zipzicles. I can make my own boozy ice pops AND healthy snacks? Sign me up! I can’t even stand how clever they are.
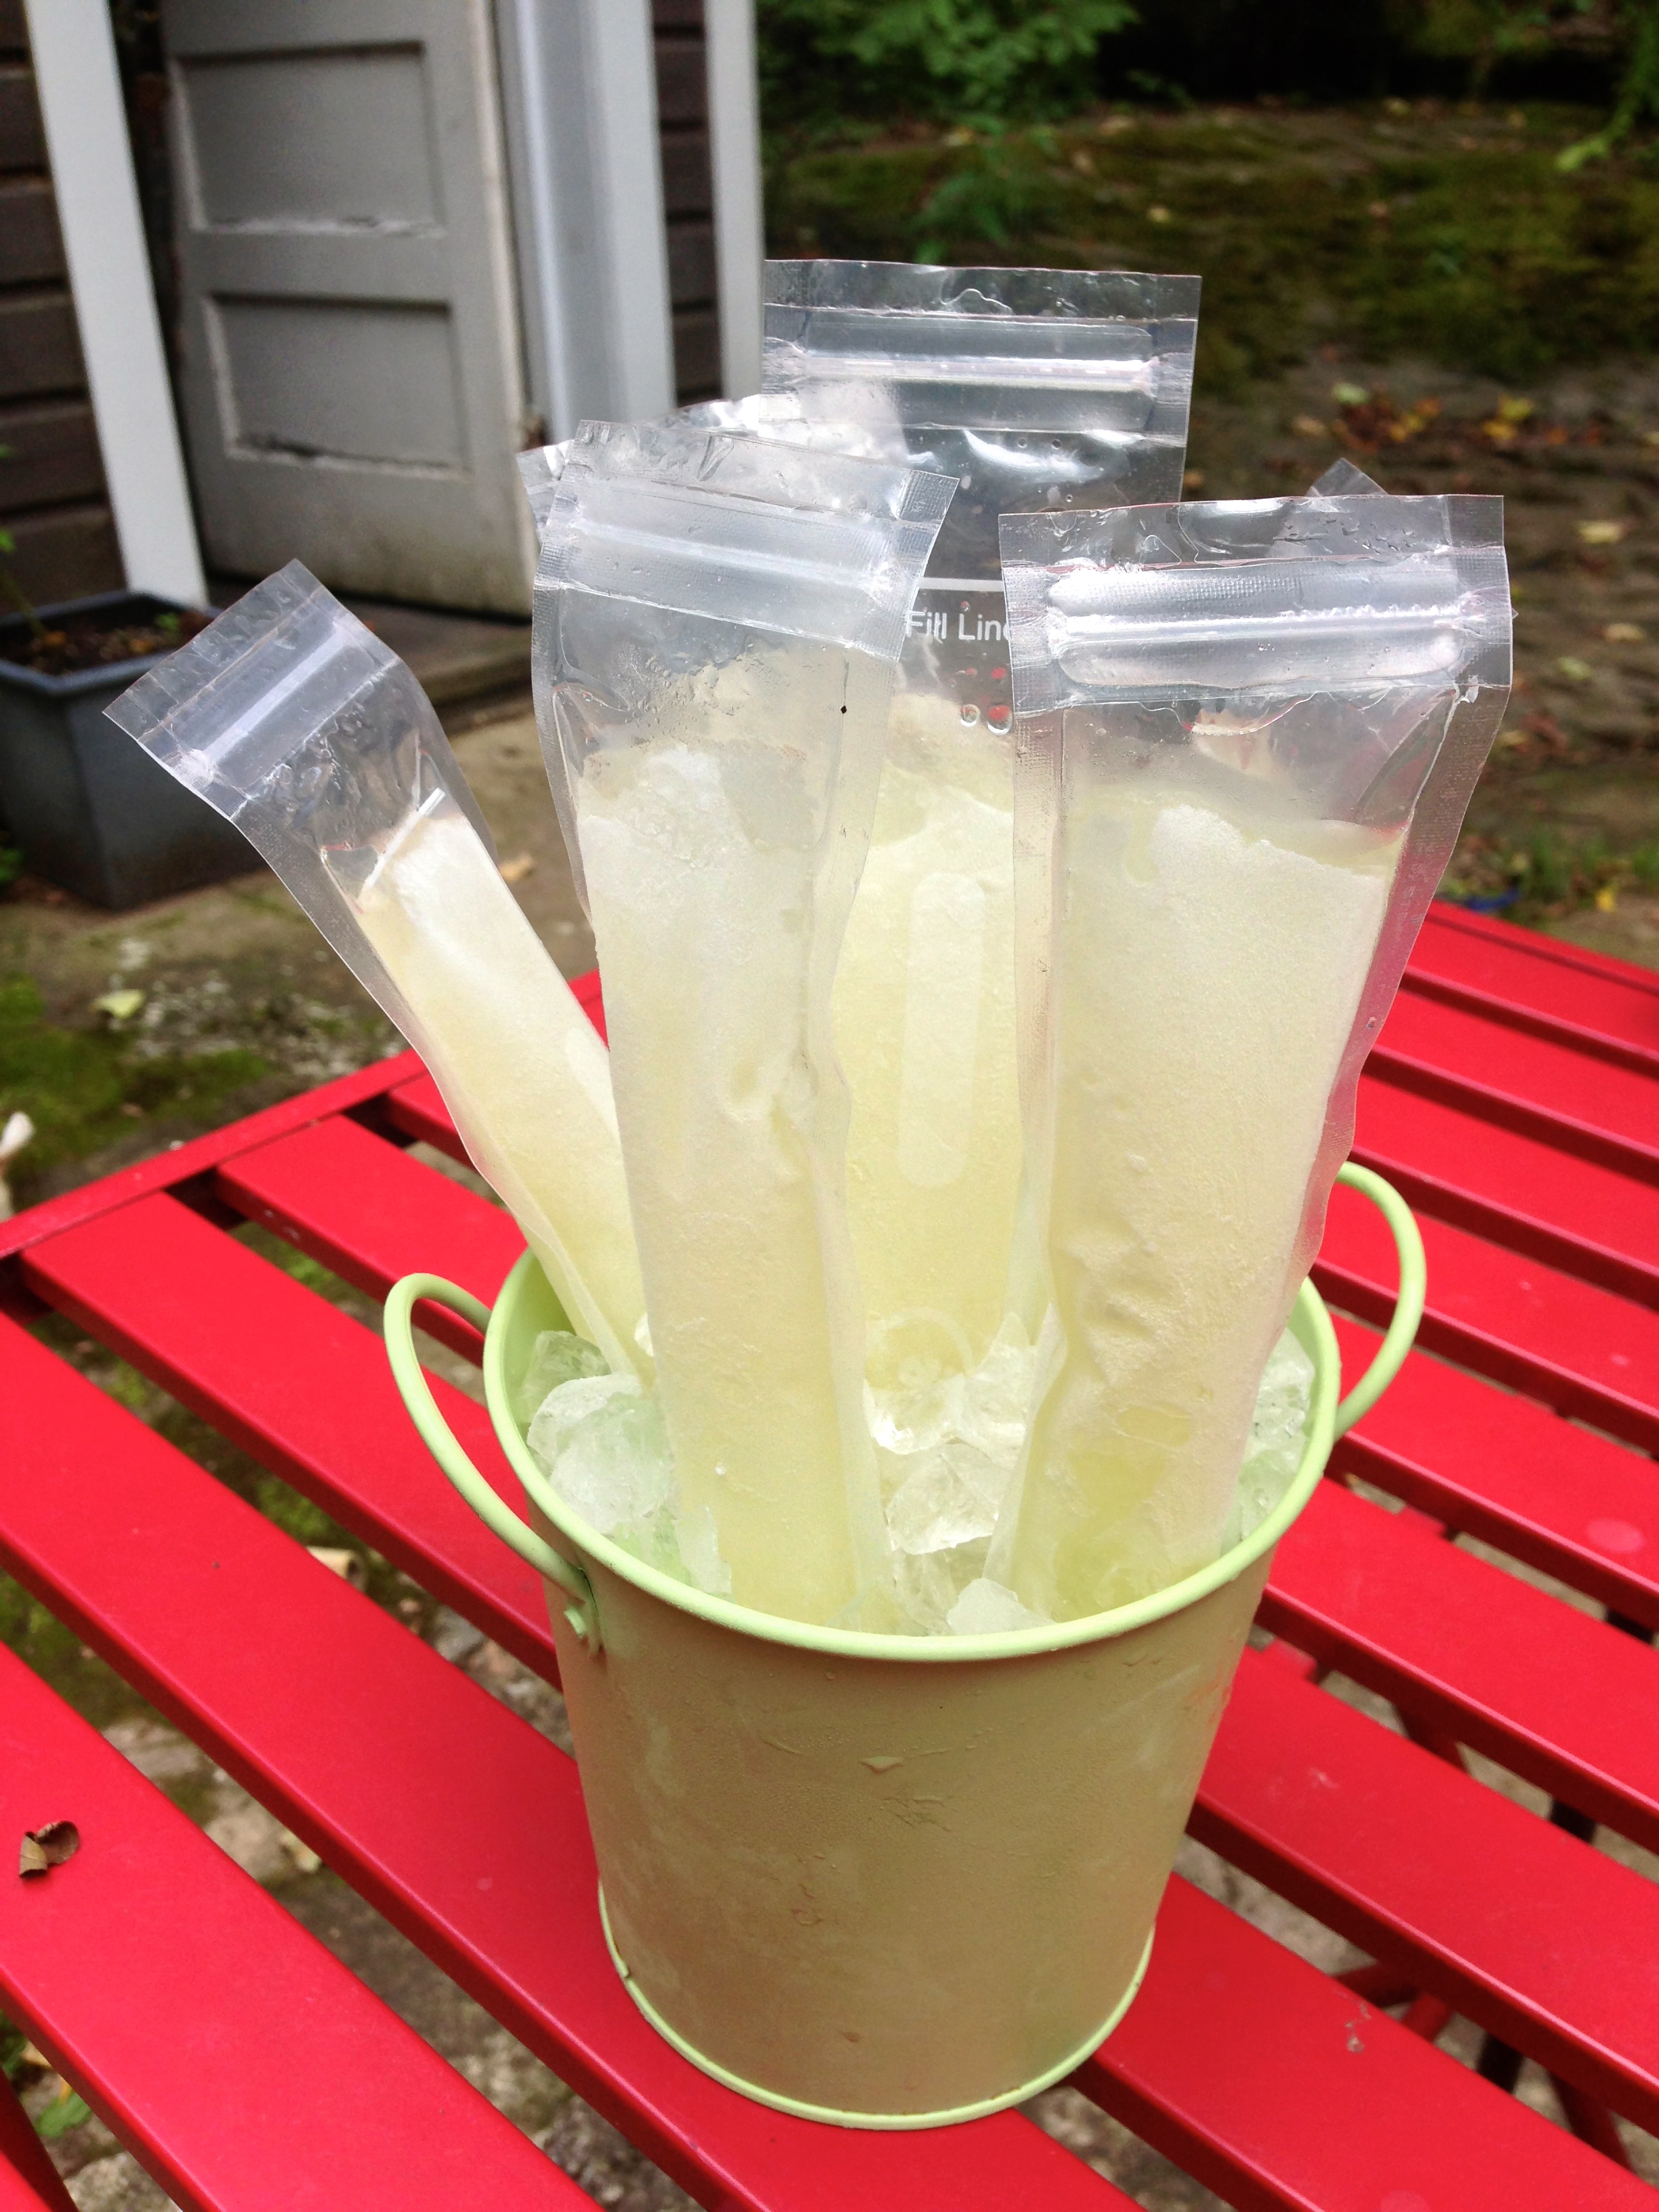
 I’ve actually tried making healthy, non-boozy popsicles before using plastic popsicle makers but they always crack (see photo of my 3rd & final popsicle making contraption below), take up cabinet space & the pops themselves are too big. I’m usually sick of eating it before I’m 1/2 way done & waste a lot. So, I was excited to have another way to make all the recipes I have saved in my kitchen drawer. The Zipzicle site has a short list of recipes to try, too, but a simple search for popsicle recipes yields a ton more.
So far, I’ve made & enjoyed frozen margaritas (interesting that they didn’t freeze 100%…I guess tequila has a different freeze point?) and tangy blueberry pops, both pictured below and both worthy of making again.
Next up we’re going to make Orange Dreamzicles, Strawberry Shortcake Greek Yogurt pops, and Fudgesicles. Lord knows we’ve eaten our way through enough store-bought Fudgesicles to make a hut made of leftover sticks.
The only improvement I would make to the design is to have a tad more plastic above the zip so our fat fingers can open them a little easier. That’s nitpicking, though, because they are nifty little suckers. Best part? After eating half of the tangy blueberry pop, I was done. Rather than have to pitch the rest, I simply zipped it back up and put in the freezer to eat later. I was able to rinse out and reuse all the Zipzicles twice now, so the $2.99 price for 12 packets ends up going a long way.
The kind folks at Zipzicle are giving away a package of 12 to three lucky winners! Enter to win below. I know you’ll love them, too!
P.S. No compensation was received for this post. I received a complimentary package of Zipzicles for my review and they are providing the three packages for the giveaway.

Bummer. 
The lab. 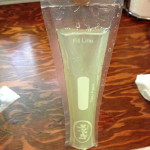
Fill ‘er up! 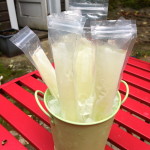
Margarita pops! 
Tangy Blueberry pops 
Prying one open 
Yum! -
Spicy Brown Mustard
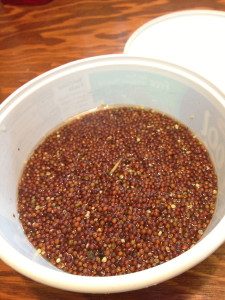
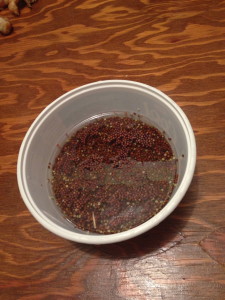
To make mustard, all you REALLY need is mustard seeds and vinegar. Who knew?
Soak overnight in non-reactive, airtight container at room temperature. Pictured at right, you can see how the seeds are at the bottom and much of the vinegar is pooled on top. Then, after a day, how the vinegar is almost entirely soaked up by the seeds.
- 1 cup white wine vinegar
- 3/4 cup brown mustard seeds
Put your seeds and vinegar into a blender and pulse till blended. Anything else is optional. I added:
- 2 tablespoons dry white wine (or water if you’re teetotaler or whatever they call it)
- 1 teaspoon salt
- 1/2 teaspoon turmeric
- 1 teaspoon ground mustard
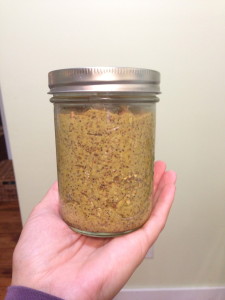
Let your blended mustard age another day or two for best results. The recipe as above filled a 16 0z Bell Jar.For spicier mustard, adding horseradish is an option. For less spicy mustard, go with a lighter color mustard seed.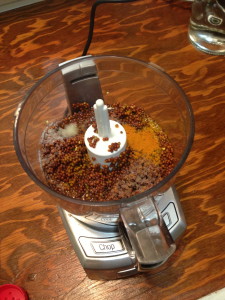
-
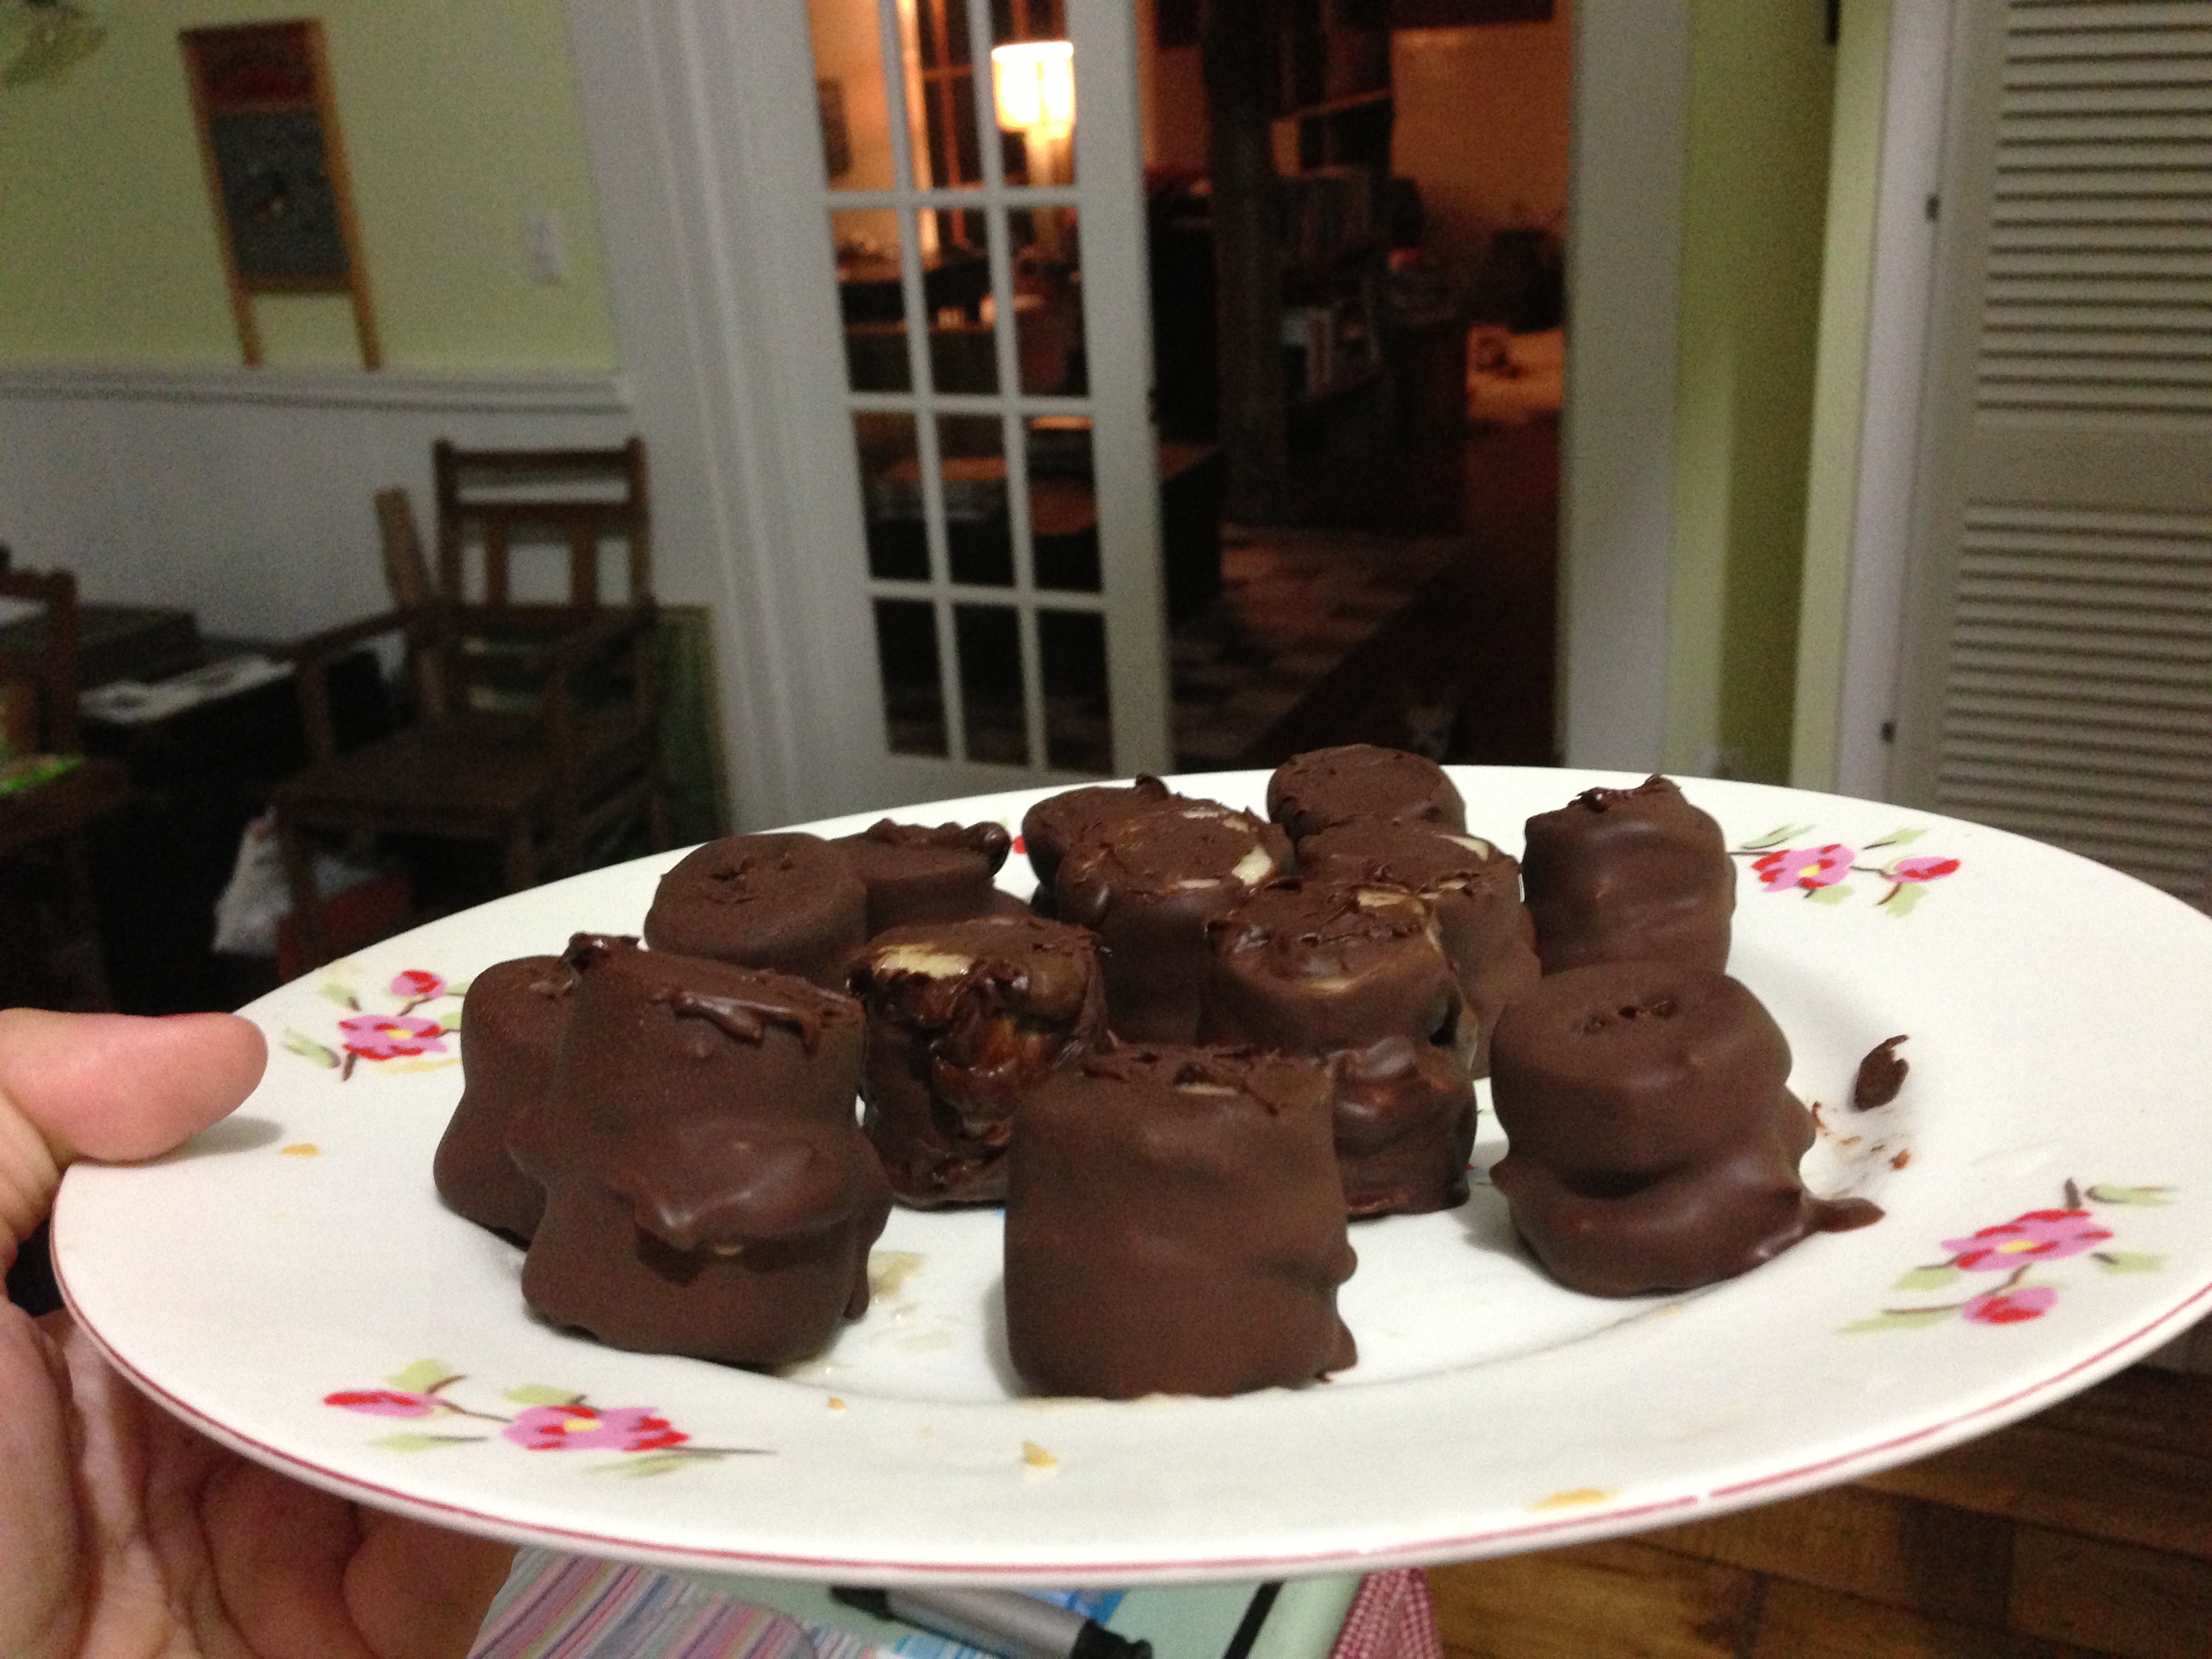
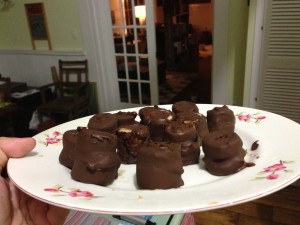
BananAppétit
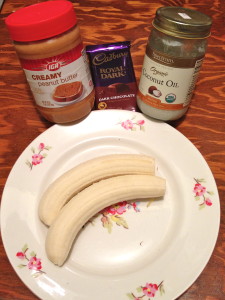
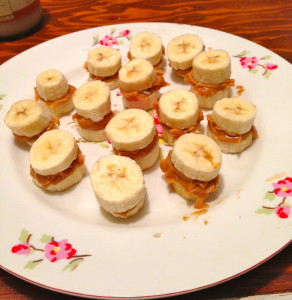
This is yummy follow up to my easy, peasy, chocolate covered fruit recipe. Behold the frozen chocolate covered banana & peanut butter sandwiches with able assistance by Paquita, the butter knife-licking Chihuahua.
*For the chocolate, melt 1/4 cup of dark chocolate with 1 tablespoon of coconut oil. For detailed instructions, click here.

-
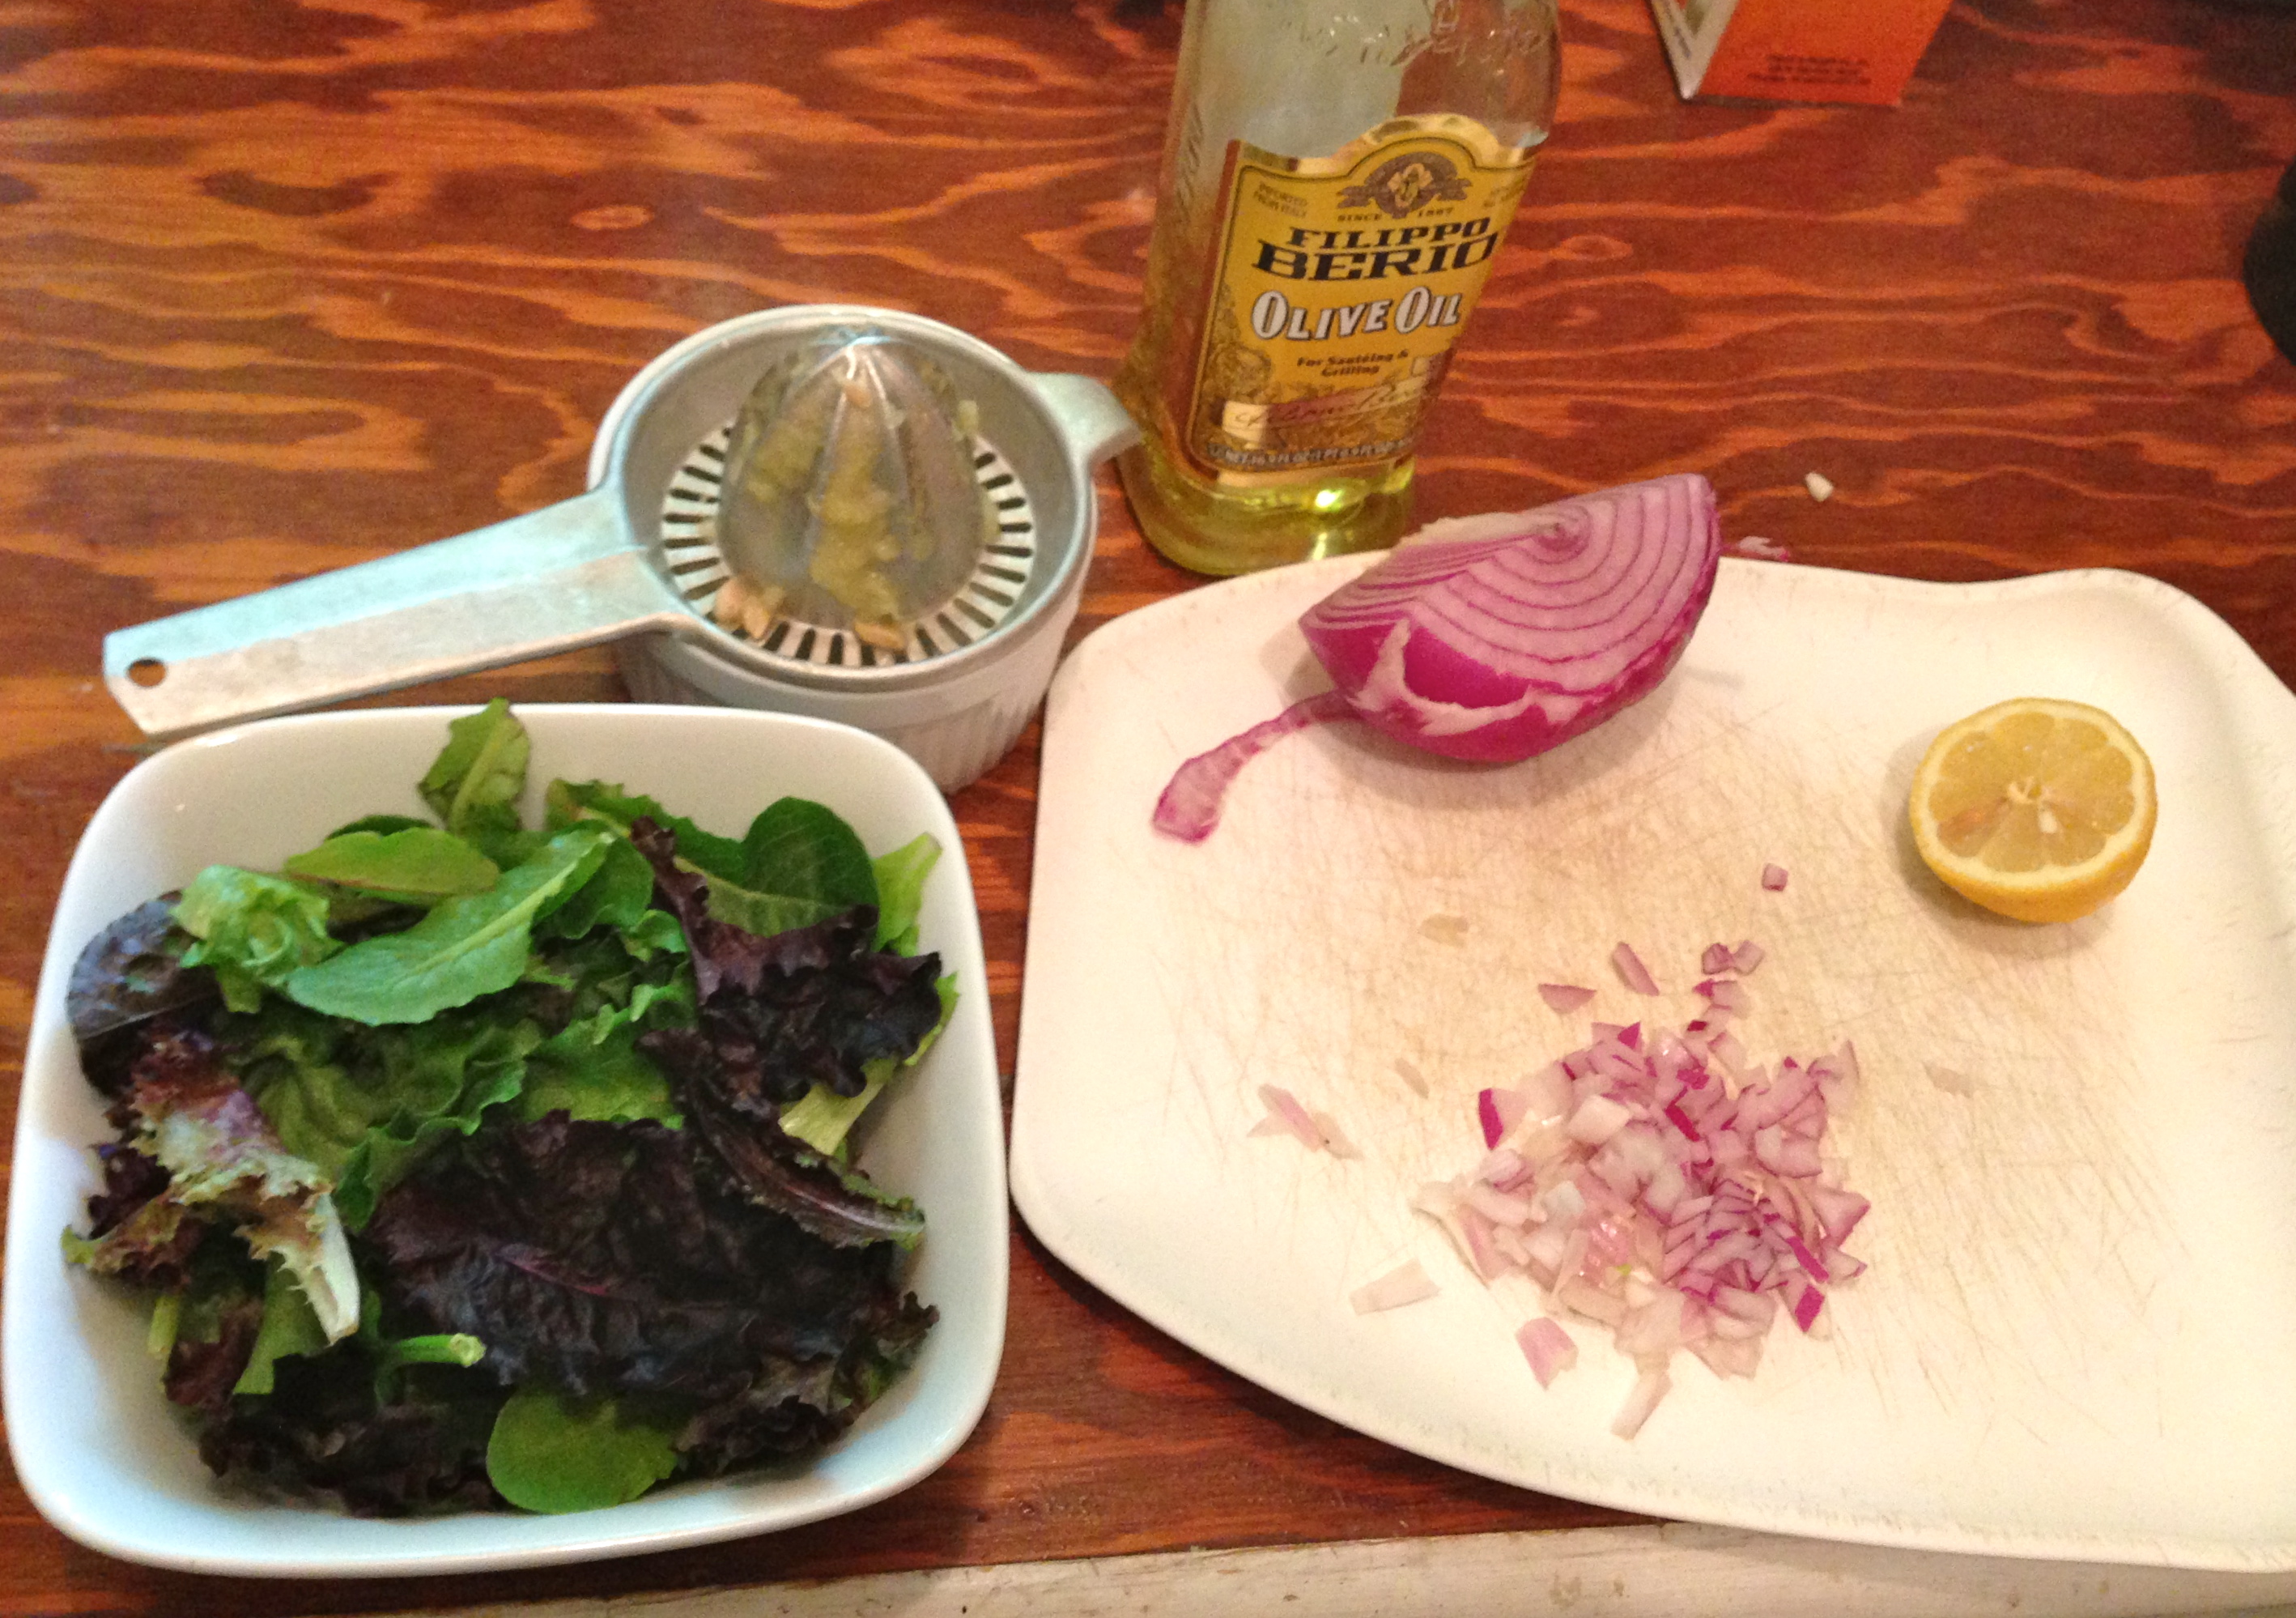
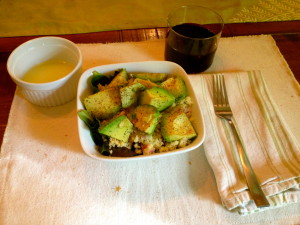
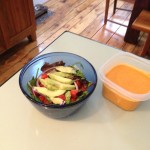
Roasted Avocado & Couscous Salad
While Christian hobnobs in LA (go see him perform!), I’m rounding out the last week of my month at the Rock House. Without the option of hundreds of restaurants and take-out menus all within a few blocks, I’ve had to seek out new things to cook for myself. I can only enjoy my Chicken Tortilla Soup so many times before it starts to feel like water torture. So, this is what I cooked up today.
INGREDIENTS:
1 Avocado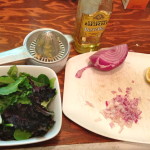
1/4 cup couscous + 1/2 tspn olive oil
1/8 of a red onion or one shallot, finely chopped
1/3 cup water
Mixed salad greens, how much is up to youDRESSING INGREDIENTS
Juice of 1 small lemon
1/2 tbsp olive oil1. Pre-heat the oven to 400. Peel and deseed (? Is that a thing? A word? Sounds naughty in a biblical sense.) the avocado and cut into quarters. Place them in a greased pan. (I spray with Pam, but whatever. You get it.) Sprinkle with salt and pepper. I went nuts on the pepper and will probably use more next time. I also used some garlic salt.
2. Roast the avocado for about 15 minutes. You want them to look a little bit golden-brown around the edges. While they’re roasting….
3. Throw some mixed greens into a bowl.
4. Juice your lemon into a little ramekin or bowl or whatever you’ve got and then stir in the 1/2 tbsp of olive oil. That’s your dressing.
5. Bring the 1/3 cup of water to boil. Once it’s boiling, add the couscous, 1/2 tsp olive oil, and red onion; cover and remove from heat. Let it sit 5 minutes before fluffing with a fork.
6. Pour yourself a glass of wine and set your table.
7. Dump the couscous and red onion mixture on top of the greens. Add the roasted avocado and drizzle with lemon-olive oil dressing.Eat your heart out and remember to thank me later!
This was one serving and a very healthy size for a girl. I ate almost 2 hours ago and am still stuffed. I could’ve done with a little less couscous for sure. On a hungrier stomach, sure. If you’re cooking for you and a dude (or, if you’re a dude, you and a chick), then double the portions and give him a bit more. That’s what I plan on doing when I see Christian next.
I also plan on trying it with quinoa instead of couscous at some point. Great option if you’re the gluten-free type. And I might throw in some grape tomatoes if they’re handy.
-
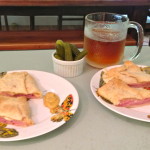
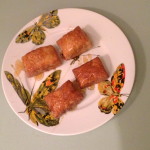
Easy Monte Cristo Sandwich a/k/a Hot Ham & Swiss
Throughout my entire high school career, the only consistent meal I ate was school lunch. Rather than pay for the three-course meal that differed each day, I stuck with the cheaper choice offered at a sort of satellite take-out counter.
“One hot ham & cheese sandwich & a peanut butter wafer, please.”
Every. Single. Day.
The only time I wavered was because my pocketbook deemed it so that I could only have one or the other.
Now that I’m a grown up*, my taste buds have matured**. To make it a little more interesting for my adult palate, I made an easy twist on the plain old (processed) ham & (processed “yellow”) cheese sandwich.
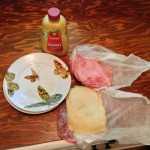
INGREDIENTS FOR TWO:
1/3 of a sheet of Pepperidge Farm Puff Pastry (Ahem. Where’s my %, dudes. I’m still pimping ya!)
Deli ham of your choosing
Genuine fresh Swiss cheese
Dijon or other spicy mustard
One egg, lightly beaten (optional)DIRECTIONS:
1) Pre-heat the oven to 400°
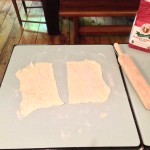
2) Roll out 1/3 of a sheet of puff pastry on to a lightly floured surface into a 12″ square then cut it in half.
3) Add a few slices of deli ham & swiss on each square of dough & smear it with dijon/spicy mustard.
4) Fold over your dough to make a sealed sandwich.
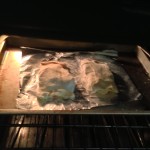
5) Coat with an egg wash if you like your dough looking brown and done. I’m cheap, so I save the egg unless I’m trying to show off for comp’ny
6) Bake for 20 minutes at 400°
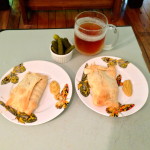
7) Cut each sandwich in half and serve with cornichon pickles & an ice cold lager, because that’s what I like and I assume you’re inviting me over for lunch.For a sweet twist on this savory recipe, skip the mustard and serve with maple syrup and a dusting of confectioner’s sugar.
*Still sucking syrup out of the bottle like it’s my mama’s teat & eating olives & pickles from the jar. I fear this will not change. Grown ups don’t do these things, do they?
**Matured=died. They’re dead. It takes habanero peppers drenched in wasabi make me taste anything.
-
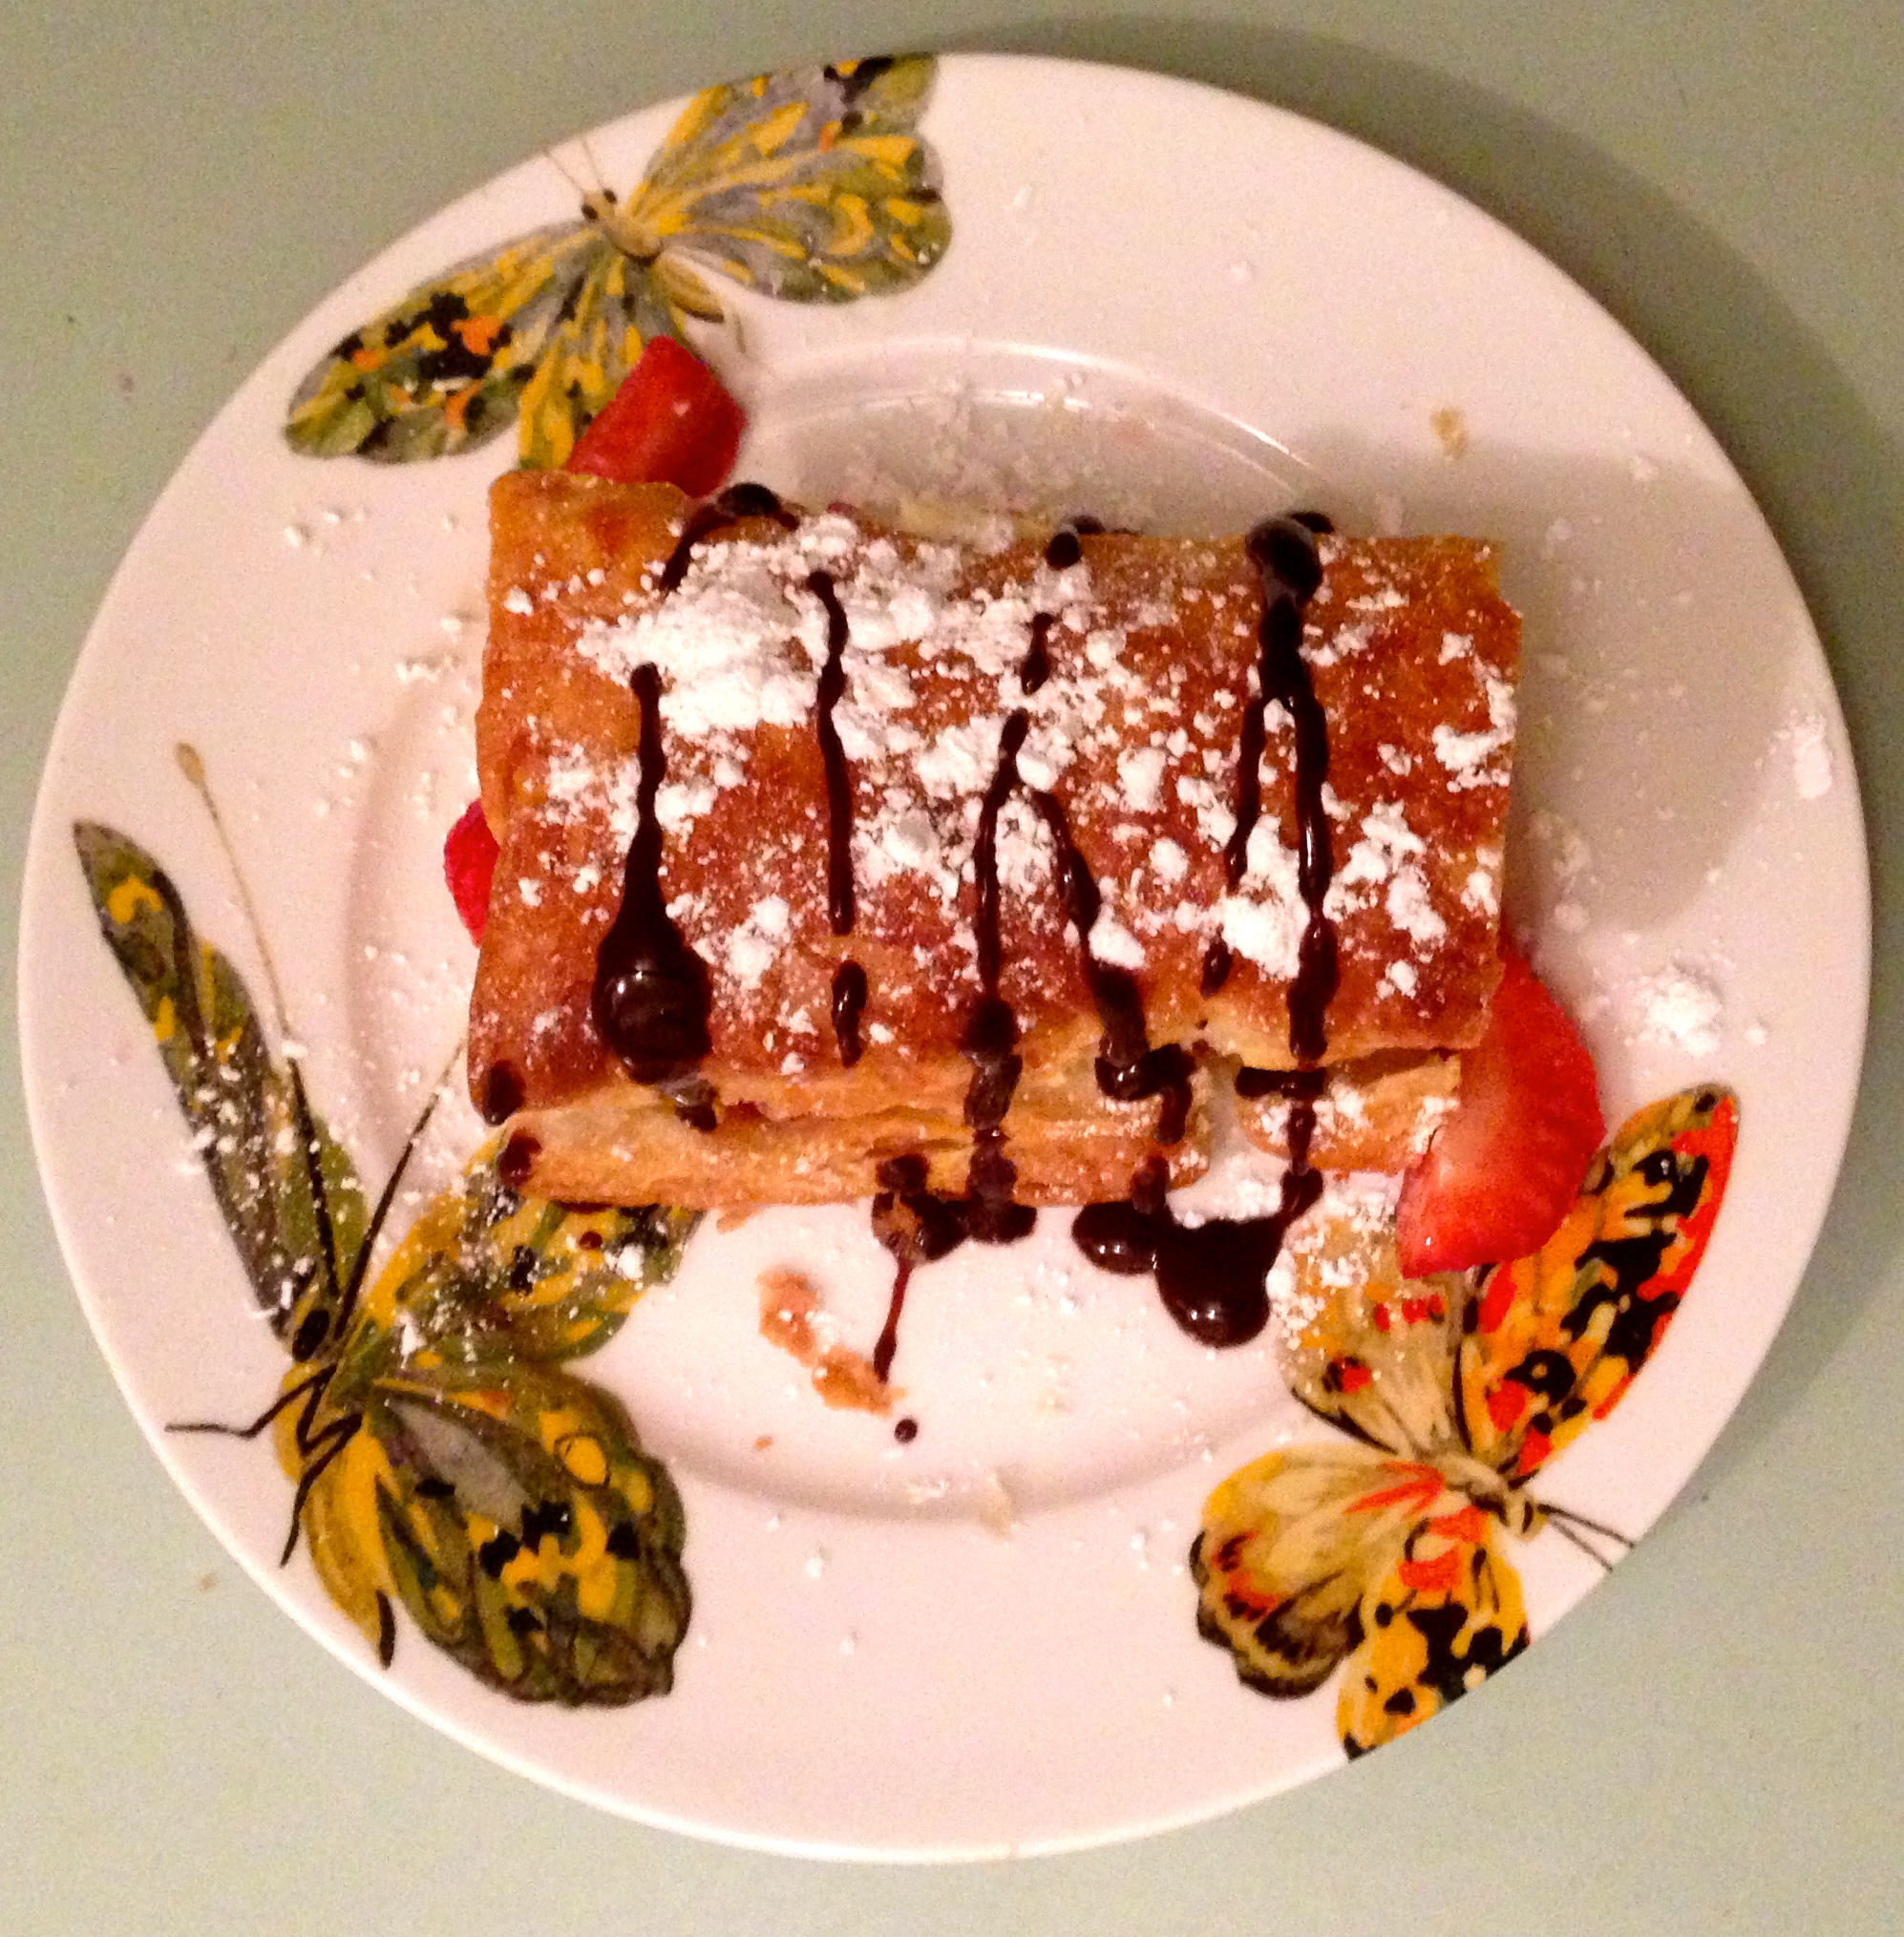
Sugar & Spice & Everything Nice Cream
 In high school, I studied Spanish for two years under the tutelage of Mrs. Spooner. One assignment required us to make a Mexican dish of our choosing. I elected sopapillas because, A) I loved them, and B) I knew I could get them at Pancho’s at their freakishly cheap “all you care to eat” buffet. After chowing down, I could simply raise the Mexican flag at my table, request additional sopaipillas from my server, stuff them in my purse, repeat a few more times and still be home in time for Moonlighting.
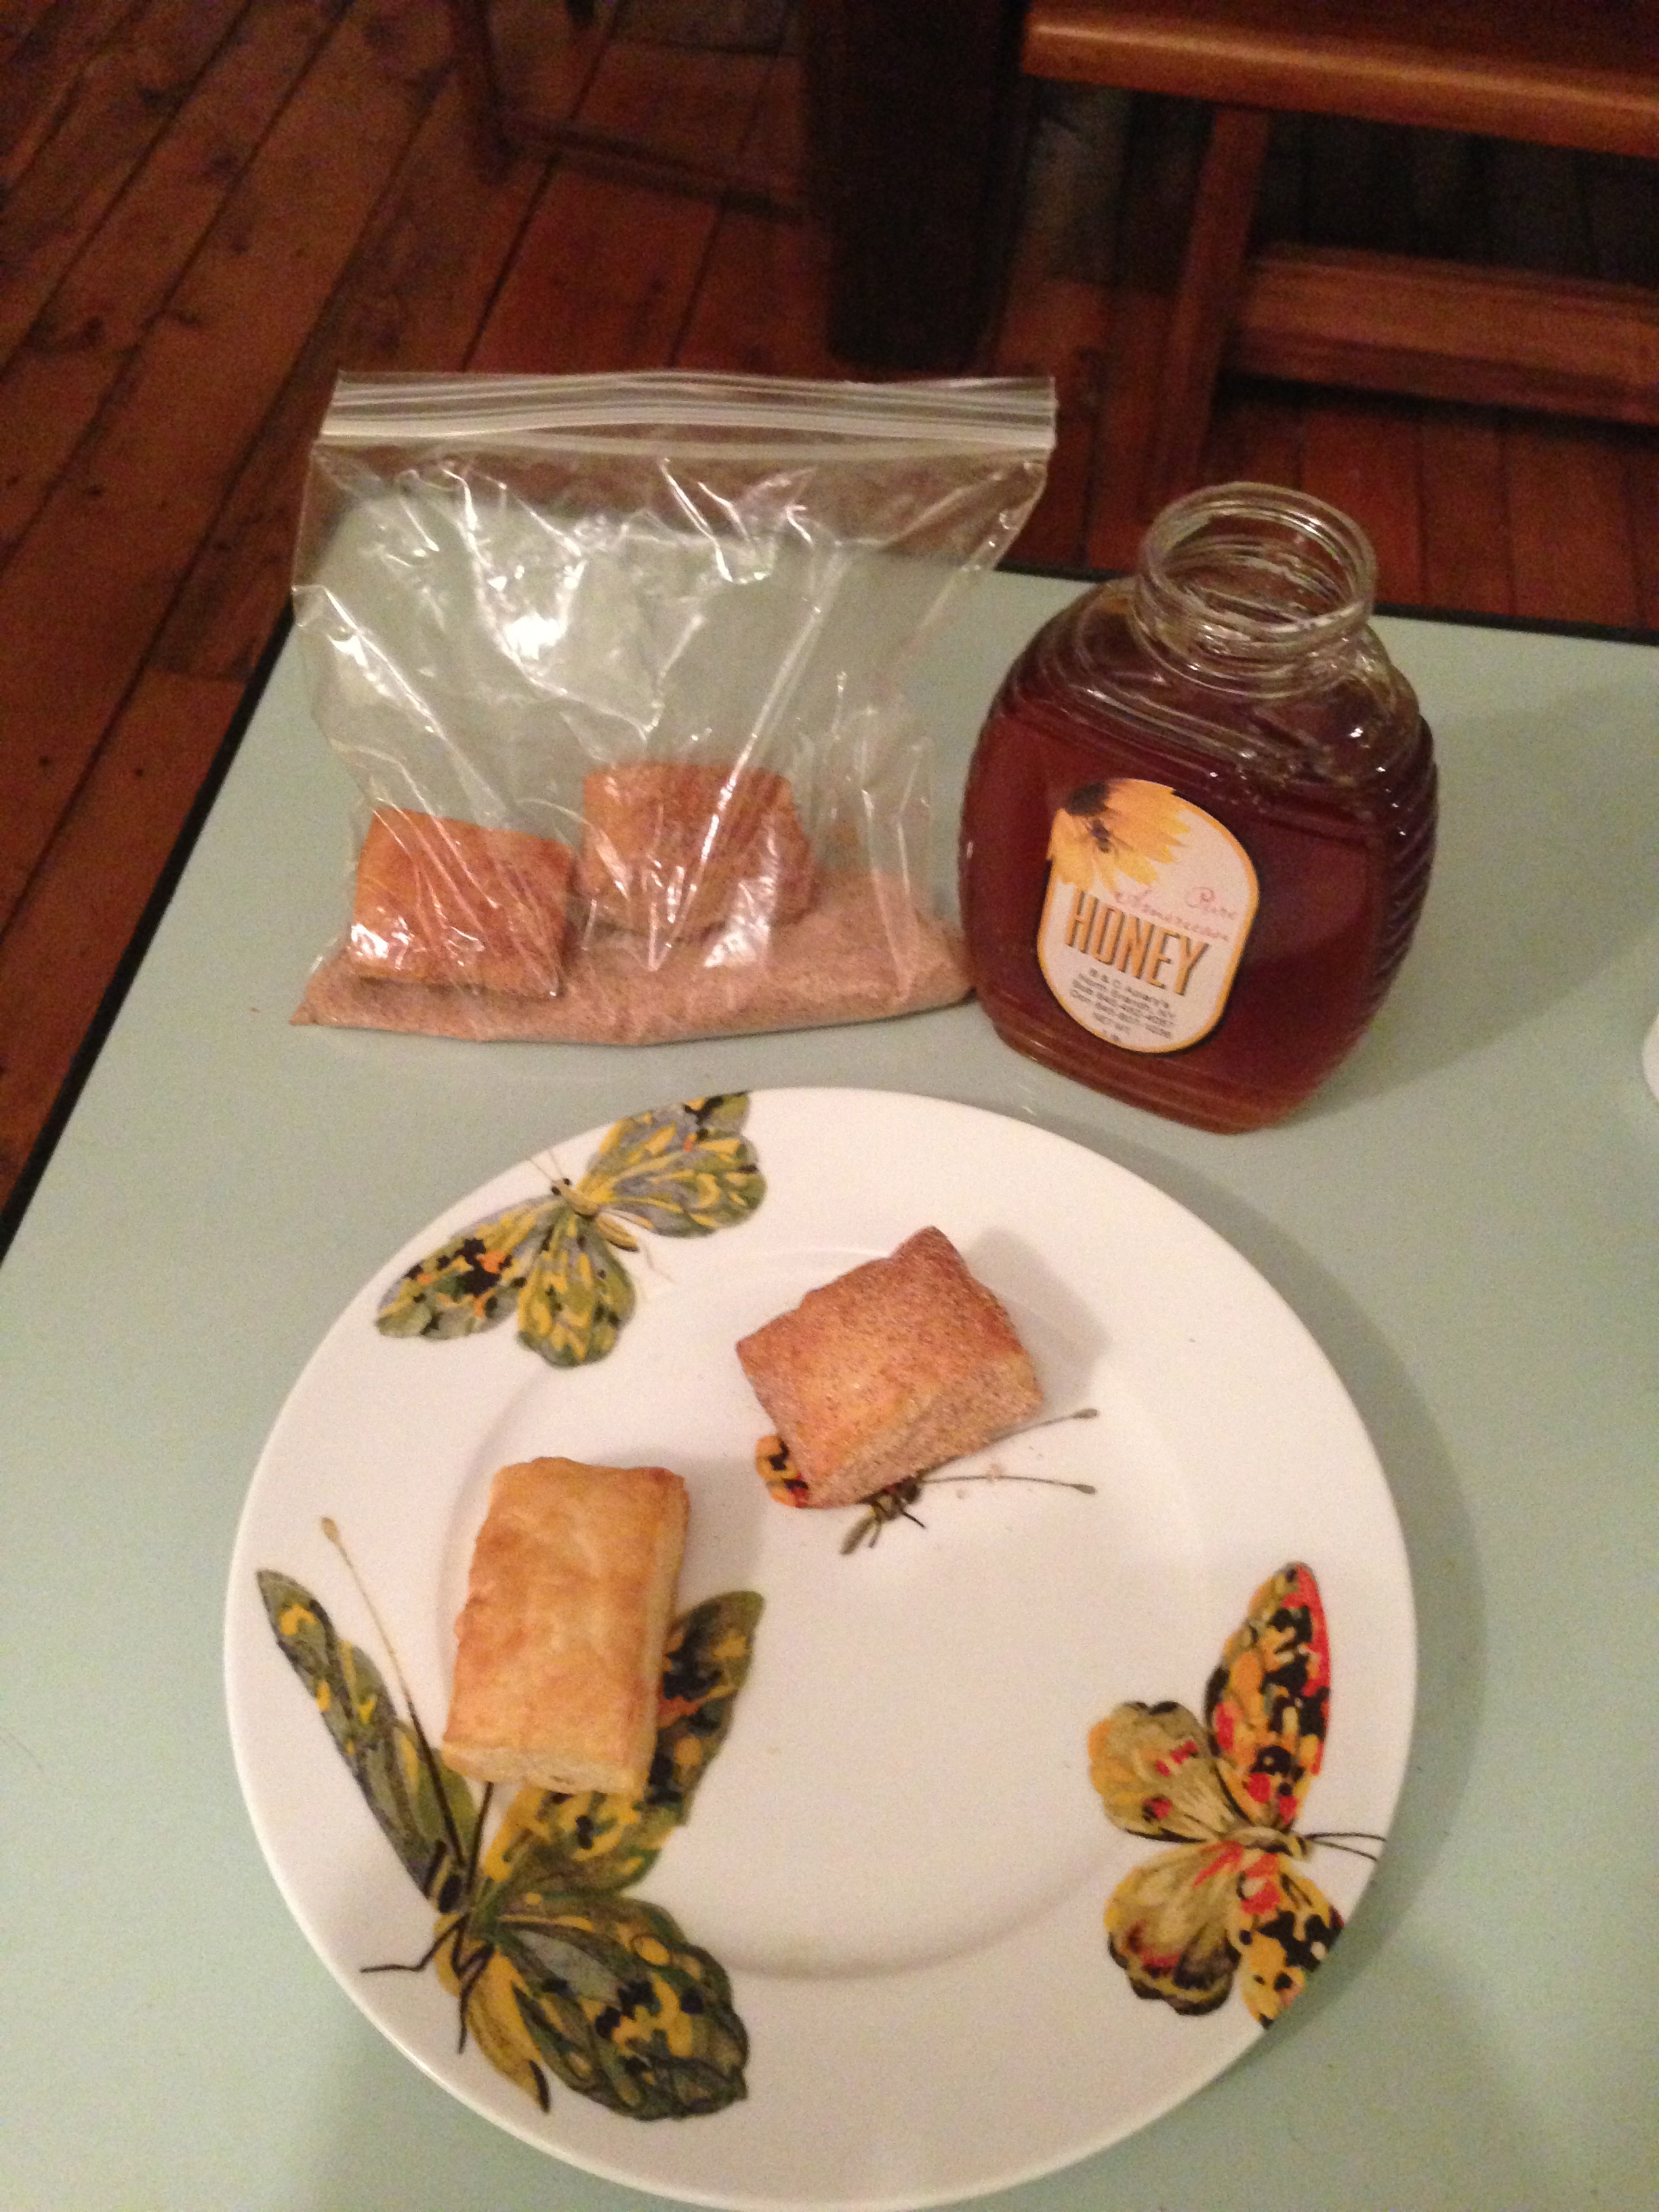
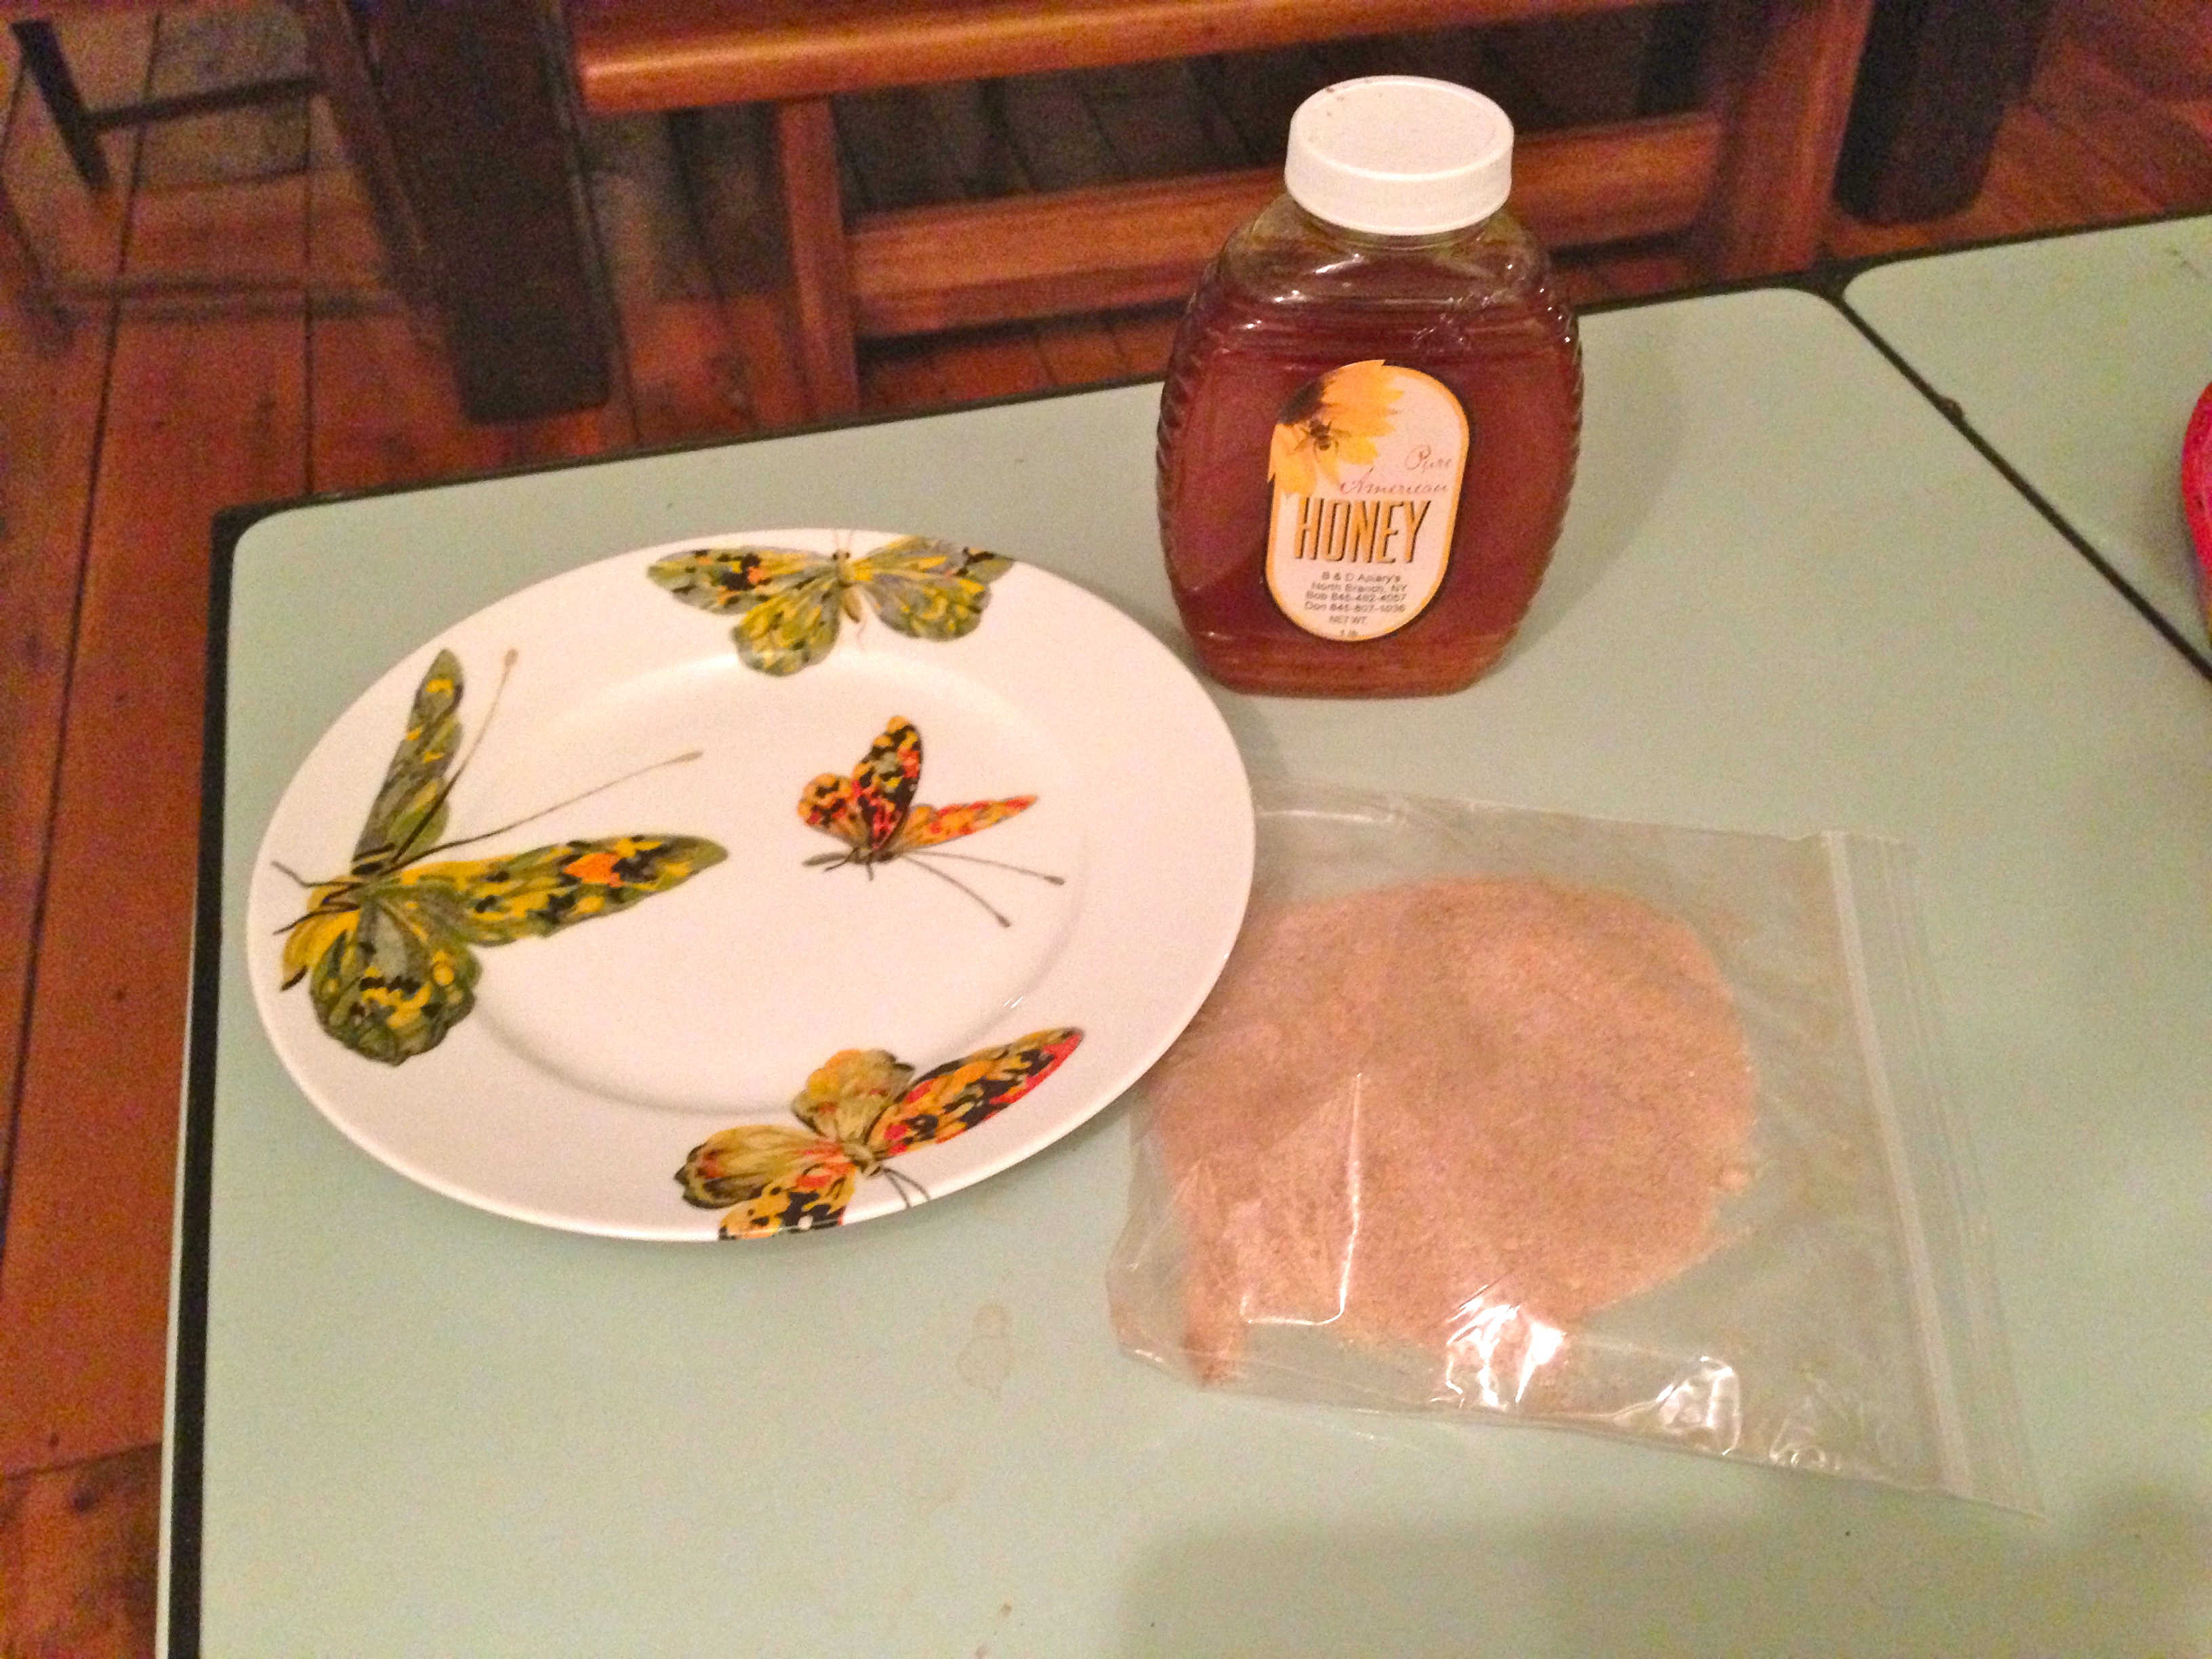
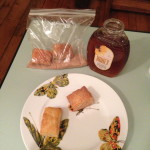
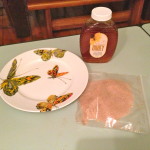
“What’s a sopaipilla?” some of you might be wondering. It’s deep-fried pastry that can be used in all sorts of dishes, but is primarily served as a dessert served in the shape of a puffed up little pillow and served with honey. We would tear off a corner, pour a little honey in the hole, swirl it around and mmm, mmm, GOOD!
I have never seen them anywhere in the Midwest or Northeast (though I’m sure I’ll hear from someone telling me where they serve them around these parts). The one time I did order them from a menu at a New York restaurant, they were not sopaipillas. They were hard & crunchy like cinnamon pita chips. That was my first and last attempt since 1991.
Now that we have the Rock House, I’ve enjoyed cooking, baking, making, trying all sorts of things. So when I came across this sopaipilla recipe in In Style magazine, I clipped it. It’s been sitting in a drawer ever since. I mean, it looks delicious. But it also looks like a messy hassle. Look at the list of ingredients and all those steps in the instructions. Frying, too? Messy & bad for me and…ah, forget it.
Fast forward to today when I came across the recipe stuck in a drawer. “Hey, wait a second? Isn’t a sopaipilla basically just puffed pastry?!”
PUFFED PASTRY! AKA my new BFF and answer to all the world’s ills. Since discovering it a few months ago (Like I’m Chris Columbus or something. Heh. You’re welcome for The Americas, BTW!), I’ve used it for pot pies, egg soufflés, desserts, tarts, pizzas, you name it. If it came in queen-sized sheets, I would sleep with it like a down comforter. That’s how versatile and easy it is. How easy? I’M GONNA EAT IT LIKE A SOPAIPILLA!
If you don’t make your own dough, this is the hardest part: Bake the puff pastry, drizzle it with honey. DONE! Screw you Bobby Flay & your stupid, messy recipe!
Now, technically, that’s all a sopaipilla is, but I fancied it up a bit because when you get old the things that excited you when you were young only make you feel hopeless and empty and search for meaning in life. So I spiced it up a bit with sugar & cinnamon (which is how many folks eat their fritters & sopaipillas anyway. This was my first time.)
INGREDIENTS:
1/3 of one sheet of Pepperidge Farm’s Puff Pastry Sheet (they owe me a % of profits based on how much I’ve been pimping them out!)
1/4 cup sugar
1 tspn ground cinnamon
Honey
Vanilla or Caramel Ice Cream (Because screw it. WHY NOT?! It’s my mom’s birthday! {Or whatever excuse you need to justify this delicious decision.})Heat the oven to 400°F. Cut the pastry sheet into 4 squares & bake for 15 minutes or until the pastries are golden brown.
Place the sugar and cinnamon into a paper or plastic baggy and shake to combine.
Add the hot pastries to the bag and shake until coated with the sugar mixture. Drizzle the pastries with the honey or, if you have a squeeze bottle of honey, let the diners tear off a corner and squeeze away themselves. Serve yourself first, though, because they’re best hot and you deserve the best.
Add a dollop of ice cream to the plate and you have what I call Sugar & Spice and everything Nice Cream.
-
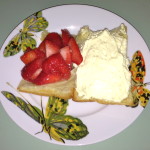
Strawberry Napoleon
I discovered puff pastry! In search of a lighter, flakier and less processed pre-made dough for my Panera knock-off soufflés, I came across Pepperidge Farm’s puffed pastry sheets. So easy, so light and the come in two frozen sheets folded into three (so six total), so I can thaw just one sheet and not have to use a whole can of crescent roll dough.
Anyway, the photo of a dessert on the box caught my eye. The recipe for the image –a “Strawberry Napoleon”– was included on the side. I never used to pay attention to those but, really, wouldn’t the manufacturer know what recipes work best for their product? Seems logical, so I decided to try out the delicious looking pastry. I’ve made it five times now and have modified the directions to a simple, user-friendly, amateur-like-me version below.
Best part: When I use sugar free Jell-O & sugar free Cool Whip & skim milk, it’s really not even bad for me and satisfies a lot of cravings.
Here’s the result, inside (L) and out (R) and the recipe with instructions:
INGREDIENTS:
1/2 of a 17.3-ounce package Pepperidge Farm® Puff Pastry Sheets (1 sheet)
1 pkg. vanilla instant pudding mix
1 cup milk
1 cup heavy cream, whipped or 2 cups thawed frozen whipped topping
1 1/2 cups fresh or frozen sliced strawberries (or blueberries, or both, or whatever. Go nuts! Or, actually, go fruity!)
A couple of squares of dark chocolate or Hershey’s Syrup [Optional]
Powdered sugar [Optional]PASTRY DIRECTIONS:
Heat the oven to 400°F. Lightly grease a baking sheet. [I actually line one with foil that I spray lightly with Pam.]Take one of the sealed packs of pastry sheets from the freezer and let them defrost at room temperature for a minute or two. Basically, it’s one big sheet that’s been tri-folded and you want to crack it into three sheets at their natural fold.
Place the pastry strips onto the prepared baking sheets and let them defrost for about 20 minutes while your oven is heating up. I usually flip them once or twice.
Bake for 15 minutes or until the pastries are golden brown. Remove the pastries from the baking sheets and let cool on wire racks for 10 minutes.
Split the pastries into 2 layers, making 6 layers in all.
FILLING DIRECTIONS:
Prepare the pudding mix with 1 cup milk in a large bowl. [Don’t use two cups like the pudding package directions say! I use sugar free instant Jell-O.] Fold in the heavy or whipped cream which ever you chose*. Cover and refrigerate for 10 minutes.*For vanilla pudding, I gotta say –in spite of the fat & calories– heavy cream is probably what I’ll do next time. I used sugar free Cool Whip and it was just too meh. No flavor at all. Maybe a drop of vanilla extract would help?
I’ve used chocolate pudding as filling once and used the sugar free Cool Whip in that instance and it was like a light mousse. It was enough flavor for me so I doubt I’ll try the fattier, heavy cream version.
Spread the filling into 1/2 of the split pastries, then pile on your strawberries and top with the other half of the split pastries.
Optional: Drizzle some melted dark chocolate or some Hershey’s syrup & sprinkle with some powdered sugar. This is easy and makes it look fancy but I’m not sure it adds much to the taste.
That’s it!
Serve immediately or cover and refrigerate up to 4 hours.
NOTE: I’ve been pre-preparing the pudding mix and baking only 1/3 of the pastry since it’s just me or sometimes me & Christian. To make the full recipe is a dang lot of dessert. I save the rest of the pudding mix in a sealed container & make a warm pastry with fresh fruit whenever to mood strikes. Like now. When I typed this. YUMMMM. My keyboard is sticky now!
For easier slicing, refrigerate the Napoleons for a least 1 hour and use a wet serrated knife.
If you want the Pepperidge Farm version which includes icing made of confectioners’ sugar & stacking into two layers, check it out here. I tried the layers and it looked like a 2-yr-old snuck in before the party and tried a sampling of each and every piece. A huge mess. As for the icing, I’ve made it. It adds nothing to the flavor, IMO. Maybe I’m not good at making icing, but it’s not worth the calories or sugar for me. So I left it off of my ingredient’s list up top.
-
Pickled Pepper Relish
Found this yummy recipe via Oprah. It’s from Megan Johnson, chef at Casellula Cheese & Wine Café in NYC.
 2 cups Pepperoncini peppers
- 1 cup cornichon pickles
- 1 small shallot, chopped
- 1 tsp. red chili flakes
- 1 tbsp. crisp white wine
- Salt and pepper to taste
Throw all ingredients in a food processor and pulse / grind / chop / whatever till it’s the desired consistency. It has some KICK and was amazing on our burgers. I can’t stop thinking about it, so it’s a good thing I’ve got about a cup & a half left!
-
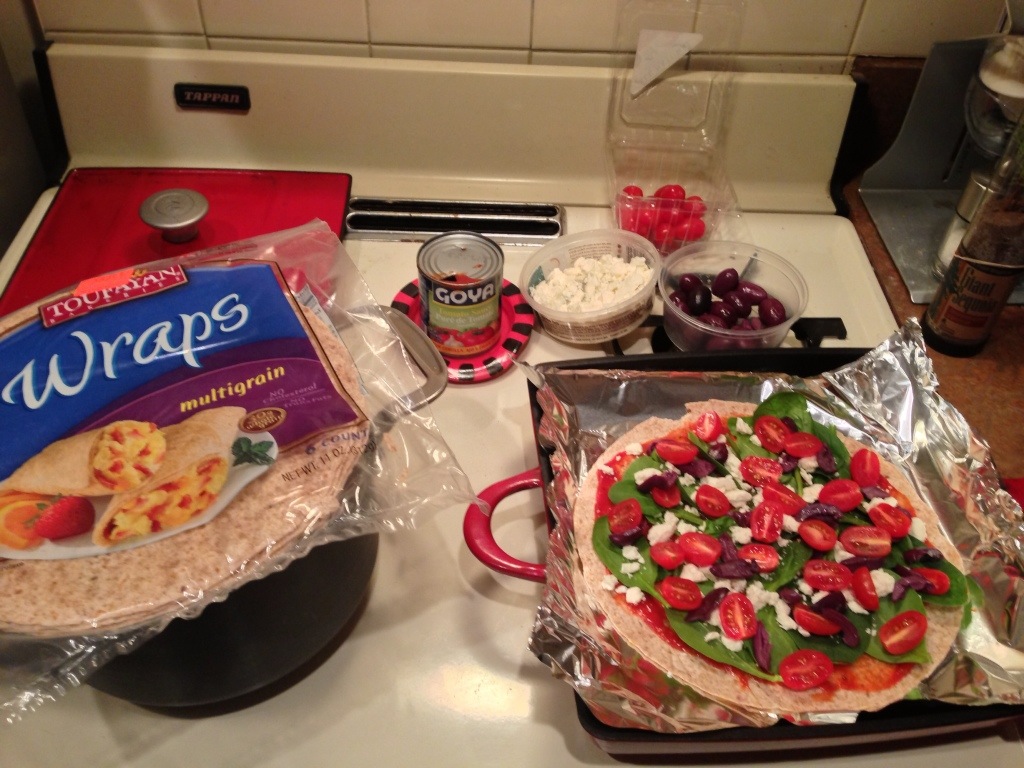
Extremely Thin Crust Pizza
My friend Jenn taught me that a tortilla makes for a great pizza crust. Using a multi-grain wrap makes it an even better choice. Using Pizzeria Uno’s cheap and healthy Mediterranean thin crust pizza as inspiration, I concocted this quick and easy dinner with tomato sauce, baby spinach, feta, Greek olives, and halved grape tomatoes.
UPDATED:
So some pals wanted more instruction. Okay, so put on more baby spinach than you think necessary…even more than you see below. It shrinks dramatically when cooked.Yes, you can add onions and capers or anything else your heart desires. The cook time doesn’t really change.
I baked mine at 425 degrees for about 25 – 30 minutes. I wanted the tortilla crispy and the toppings hot. I ate it once after only about 15 minutes because I was starving & in a hurry. The tortilla was still very flexible so I was able to make it into a wrap. It was okay, but I prefer the crispy tortilla.
You can’t really go wrong unless you burn it which won’t happen if you’re paying attention. Set a timer if you’re prone to zoning out.
-
Mexican Pasta Salad Recipe
Christian’s not into most vegetables, so I was looking for a side dish and found this one for Mexican Pasta Salad. We’re fans of anything with jalapeños, lime juice and cilantro so we gave it a shot and loved it. We ate it with grilled pork chops and a green salad covered in our homemade Ginger Carrot Dressing. Delicious! The next day we added some grilled chicken to the leftover pasta which made for a filling lunch.
Ingredients

One box of spiral pasta (I use whole grain pasta)
2 cups frozen corn (or 2 ears of corn on cob)
2 jalapenos seeded and diced
2 scallions chopped
2 limes juiced
olive oil (to coat pasta)
1/4 cup Cilantro, chopped
1 can black beans, drained & rinsed
salt and pepper to tasteInstructions
— Boil the pasta per directions on the box, drain and drizzle olive oil over the cooked pasta so it doesn’t stick together.–While the pasta is boiling, roast the corn, jalapenos and scallion in a pan on medium heat with a tablespoon oil. Stir and cook until corn is golden. You’ll need a lid, because the corn pops! Fun!
— Add to large bowl: pasta, corn, jalapenos, scallions, beans, cilantro and juice of limes. Add salt and pepper to taste.
*Next time I’m going to add some halved grape cherry tomatoes and an extra jalapeño.


-
Quinoa & Black Bean Salad Recipe
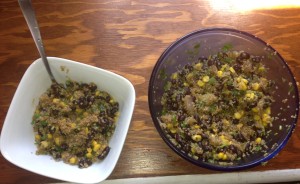 Served hot or cold, this vegetarian salad is packed with protein and flavor:
Ingredients:
1 teaspoon vegetable oil
1 onion, chopped
3 cloves garlic, peeled and chopped
3/4 cup uncooked quinoa
1 1/2 cups chicken (or vegetable) broth
1 teaspoon ground cumin
1/4 teaspoon cayenne pepper
salt and pepper to taste
1 cup frozen corn kernels (optional…I’ve done with, with celery instead and without altogether)
2 (15 ounce) cans black beans, rinsed and drained
1/2 cup chopped fresh cilantroDirections:
Heat the oil in a medium saucepan over medium heat. Stir in the onion and garlic, and saute until lightly browned.Mix quinoa into the saucepan and cover with chicken broth. Season with cumin, cayenne pepper, salt, and pepper. Bring the mixture to a boil. Cover, reduce heat, and simmer 20 minutes.
Stir frozen corn into the saucepan, and continue to simmer about 5 minutes until heated through. Mix in the black beans and cilantro.
Chow down on its own or as a side dish. Yummmmmmy!
-
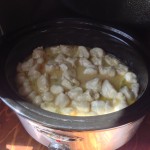
A Chicken & Dumpling Recipe So Easy…
How easy it?
So easy even your 5-year-old could do it. For the busiest of bees or if you want to introduce cooking to your young ‘en or anyone with a fear of cooking, this is the recipe. It’s foolproof, easier than pie and mmm, mmm good!
You just need a crockpot and the following ingredients:
1.5 lbs boneless/skinless chicken breast (is there any other kind?)
2 cans Cream of Chicken Soup (no water, just the regular condensed soup)
1 can chicken broth
2 cups frozen carrots/peas*
1 onion diced
2 tablespoons of butter
1 can of Pillsbury biscuitsPlace the chicken, butter, soup, broth and onion in a slow cooker. Cover, and cook for 5 to 6 hours on Low. Then, about 90 minutes before serving, place the torn biscuit dough in the slow cooker. I dunk them and then about 45 minutes into cooking the dough, I dunk and stir them again. So, total cook time about 6.5 to 7.5 hours. If you don’t want to wait that long then, I’d cook it for about 3.5 hours on high then another hour or so for the dough.
Serve in a bowl on a cold winter’s day and let this stick-to-your-ribs meal warm you from the inside out!
*Optional, but definitely don’t bother with celery. I didn’t think it added to the flavor or texture and only watered down the meal.
-
Ginger Carrot Dressing Recipe
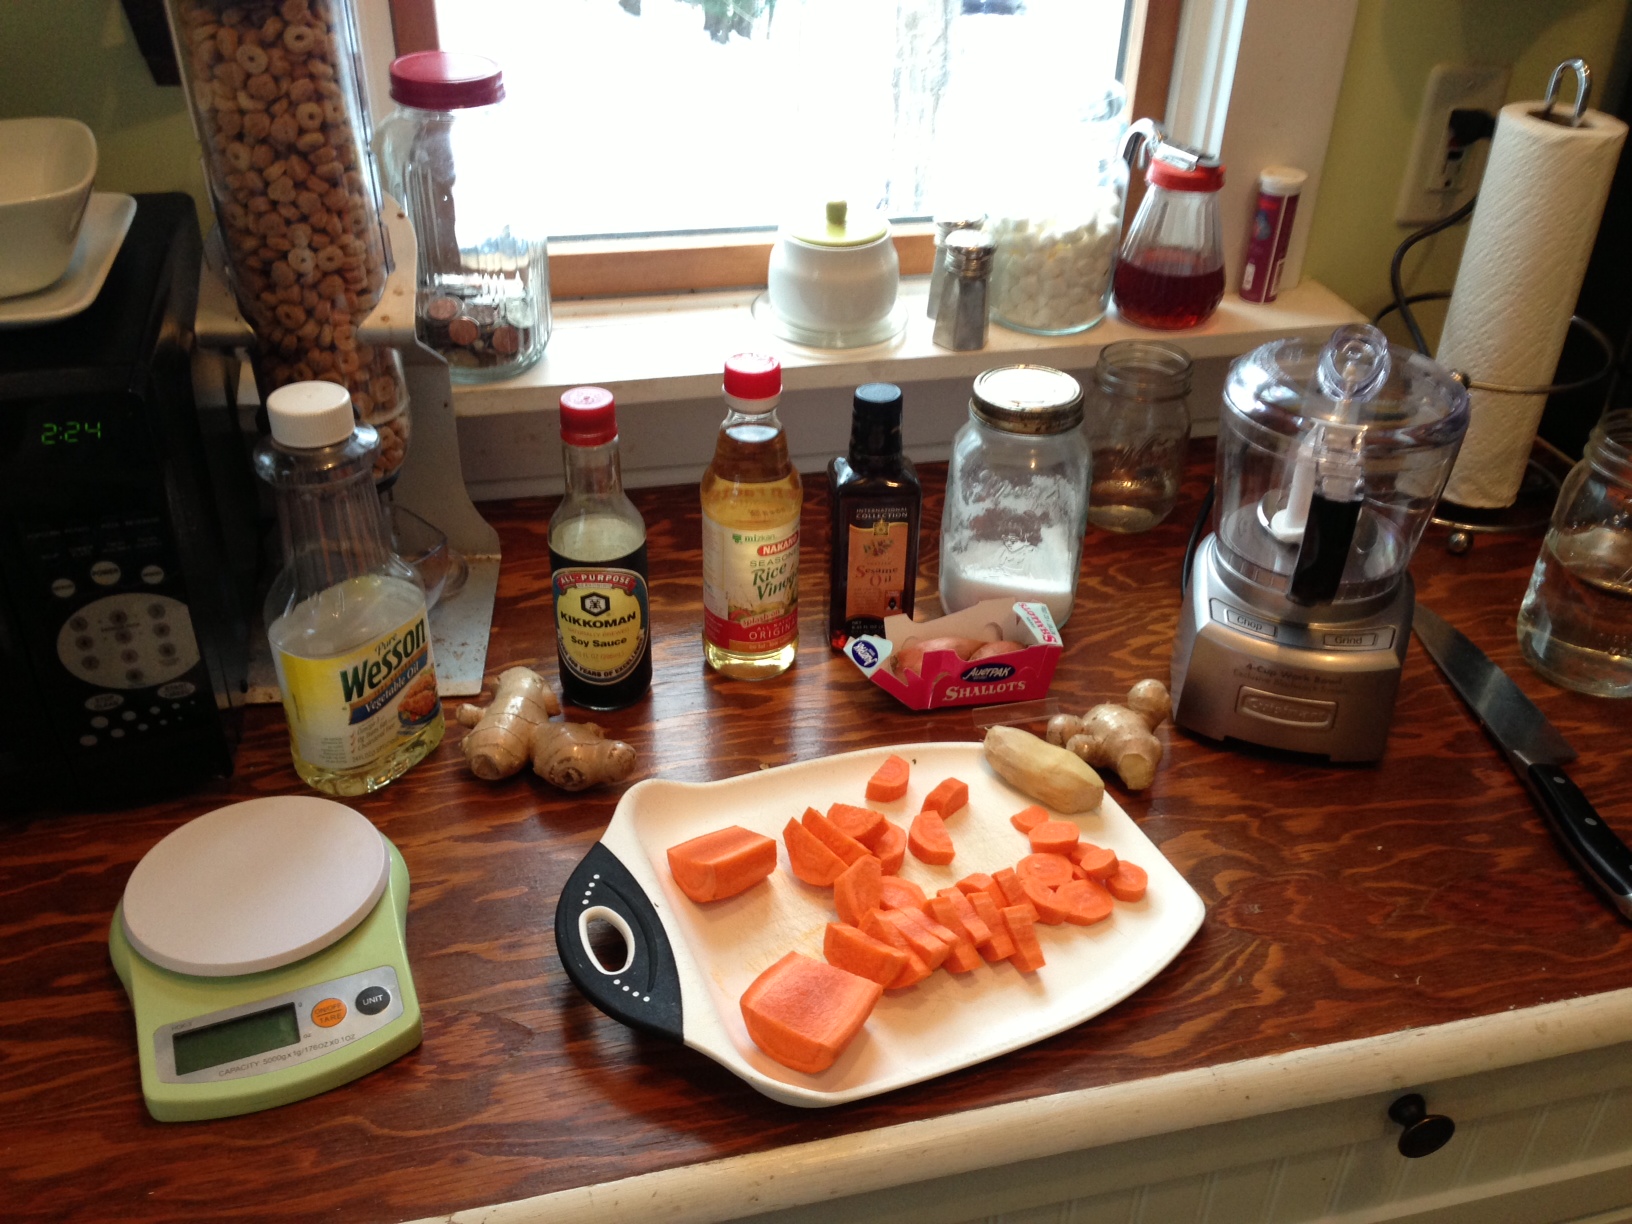
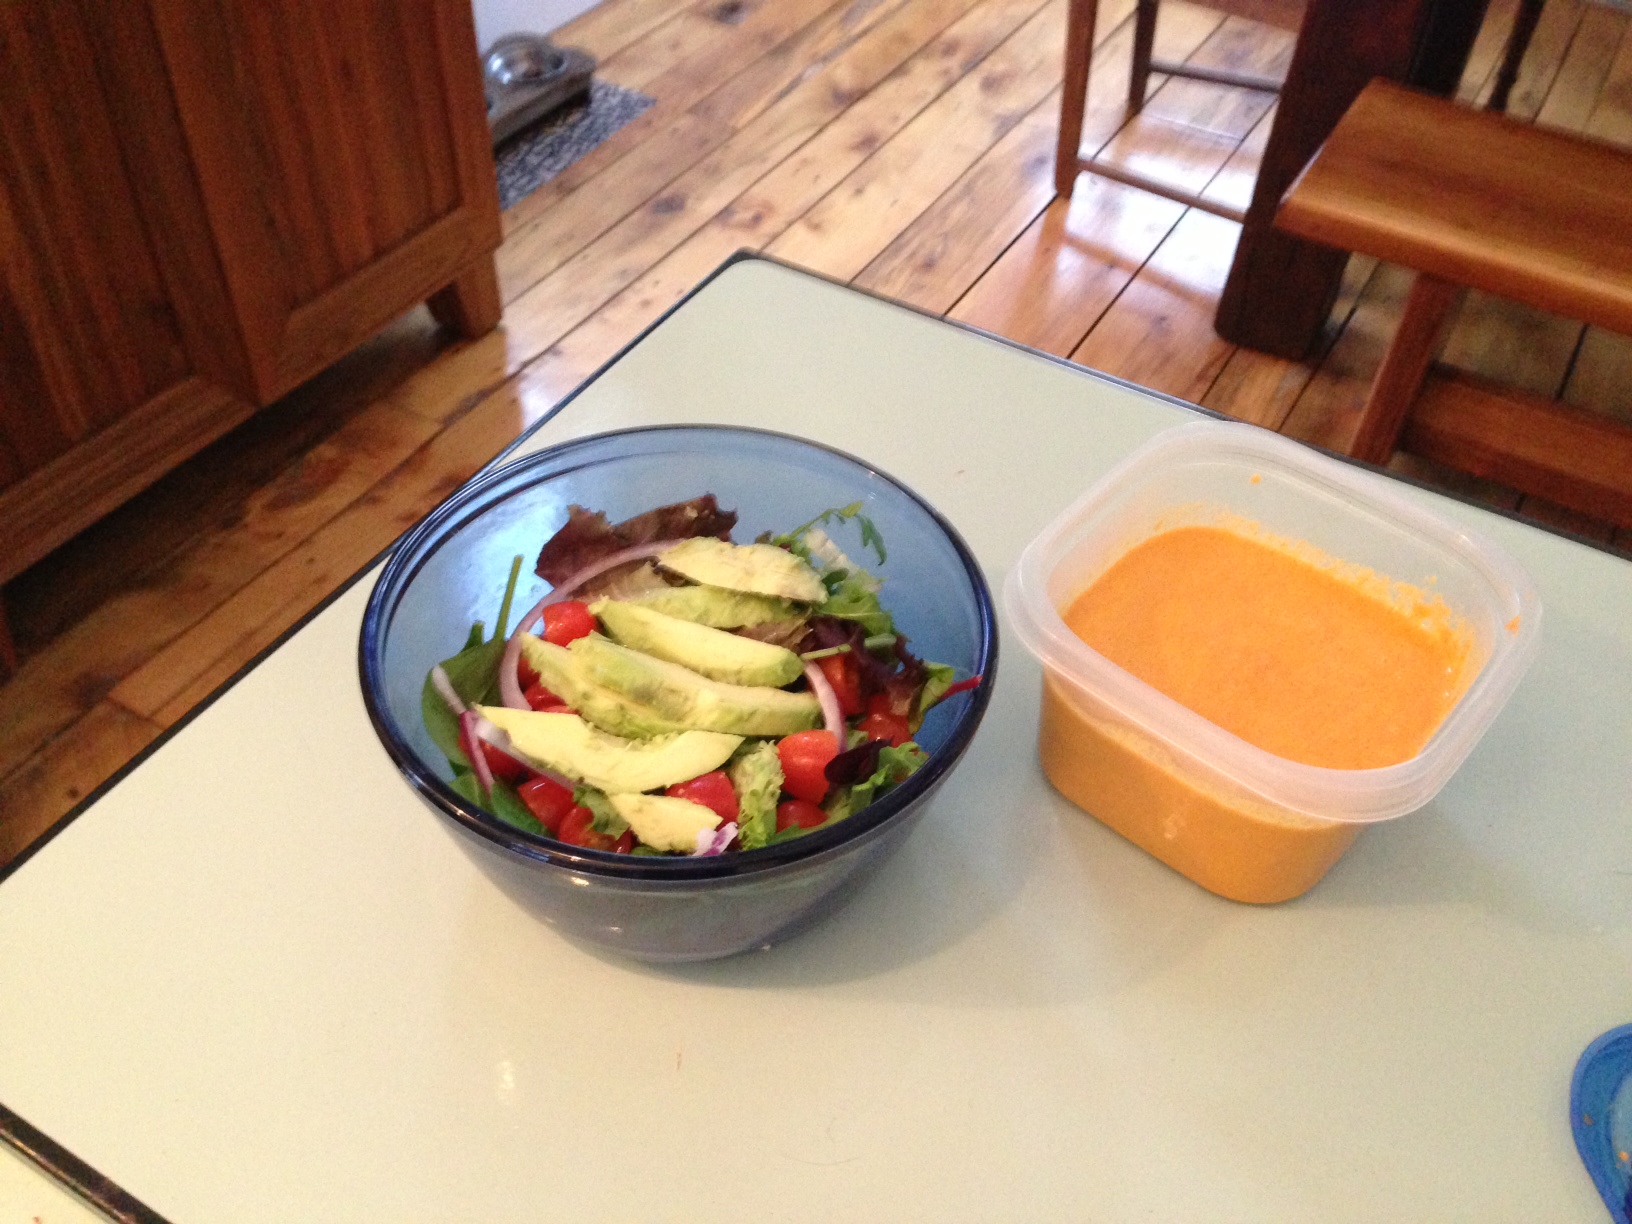
For lunch today, I finally worked up the nerve to try out my food processor that I bought specifically to make Ginger Carrot Dressing. It was delicious and easy. Honestly, if I had known cooking was so easy, I may have tried it years ago.
I used this recipe found on Epicurious.com:
- 1/2 lb carrots (3 medium), coarsely chopped
- 1/4 cup chopped peeled fresh ginger
- 1/4 cup chopped shallots
- 1/4 cup seasoned rice vinegar
- 1 tablespoon soy sauce
- 1 tablespoon Asian sesame oil
- 1/8 teaspoon salt
- 1/2 cup vegetable oil
- 1/4 cup water
Pulse carrots in a food processor until finely ground (almost puréed). Add chopped ginger, chopped shallots, rice vinegar, soy sauce, sesame oil, and salt and pulse until ginger and shallots are minced. With motor running, add vegetable oil in a slow stream. (I have never done this. I don’t even know that I can because my machine’s safety function requires the lid to be on and locked.)
Add 1/4 cup water and blend until smooth, 2 to 3 minutes. Thin dressing with additional water if desired.
Makes about 2 cups that will last up to about two weeks in the fridge.
UPDATE: I’ve made this twice since this original post. Christian thinks it could use a little more “kick” or “tang”. Vinegar perhaps? I’ll tinker with it. That said, we’re in our 40s and our tastebuds have been burnt off to worthless nubs. The recipe is perfect as-is, he’s just looking for a boost. Perhaps we’ve had a bit too much in too short a time and he’s growing bored. Is this a reflection of our marriage? Should I seek counseling or just add more vinegar? Hmmm.
-
Chicken Pot Pie Filling
 I made some yummy and easy chicken pot pies using my Chicago Metallic Pie Mold. For pie crust, I got a box of Jiffy & followed the instructions. I rolled out the dough and using the plastic mold, I cut out four sections to fill the pan wells and four for the tops.
For the filling, here’s the recipe I used/tweaked. Note that this made enough filling for about 7 to 8 pies. So, next time I make it, I’ll probably cut the portions in half.
Ingredients:
1 lb boneless, skinless chicken breast cubed
 2 cups frozen carrots and green peas
1/2 cup sliced celery
1/2 tablespoon minced garlic
3 springs thyme
1/3 cup flour
1/3 cup butter
1/3 cup onion, chopped
1/2 teaspoon salt
1/4 teaspoon black pepper
1 3/4 cups chicken broth
2/3 cup milkInstructions:
Pre-heat oven to 425.
Add chicken, carrots, peas & celery in a pot & fill with enough water to cover. Boil for 15 minutes, drain & set aside.
In a separate saucepan, cook onions in butter until translucent. Add in flour, salt, pepper, garlic and thyme. Carefully stir in chicken broth and milk. Let mix simmer on med-low heat until thick. Remove from heat.
Pour the chicken mix into pan wells then top with the hot, creamy mixture. Cover with top pie crust and seal edges.
Bake for 25-30 minutes until filling is bubbly and tops are golden brown. Let cool 10 minutes before serving.
-
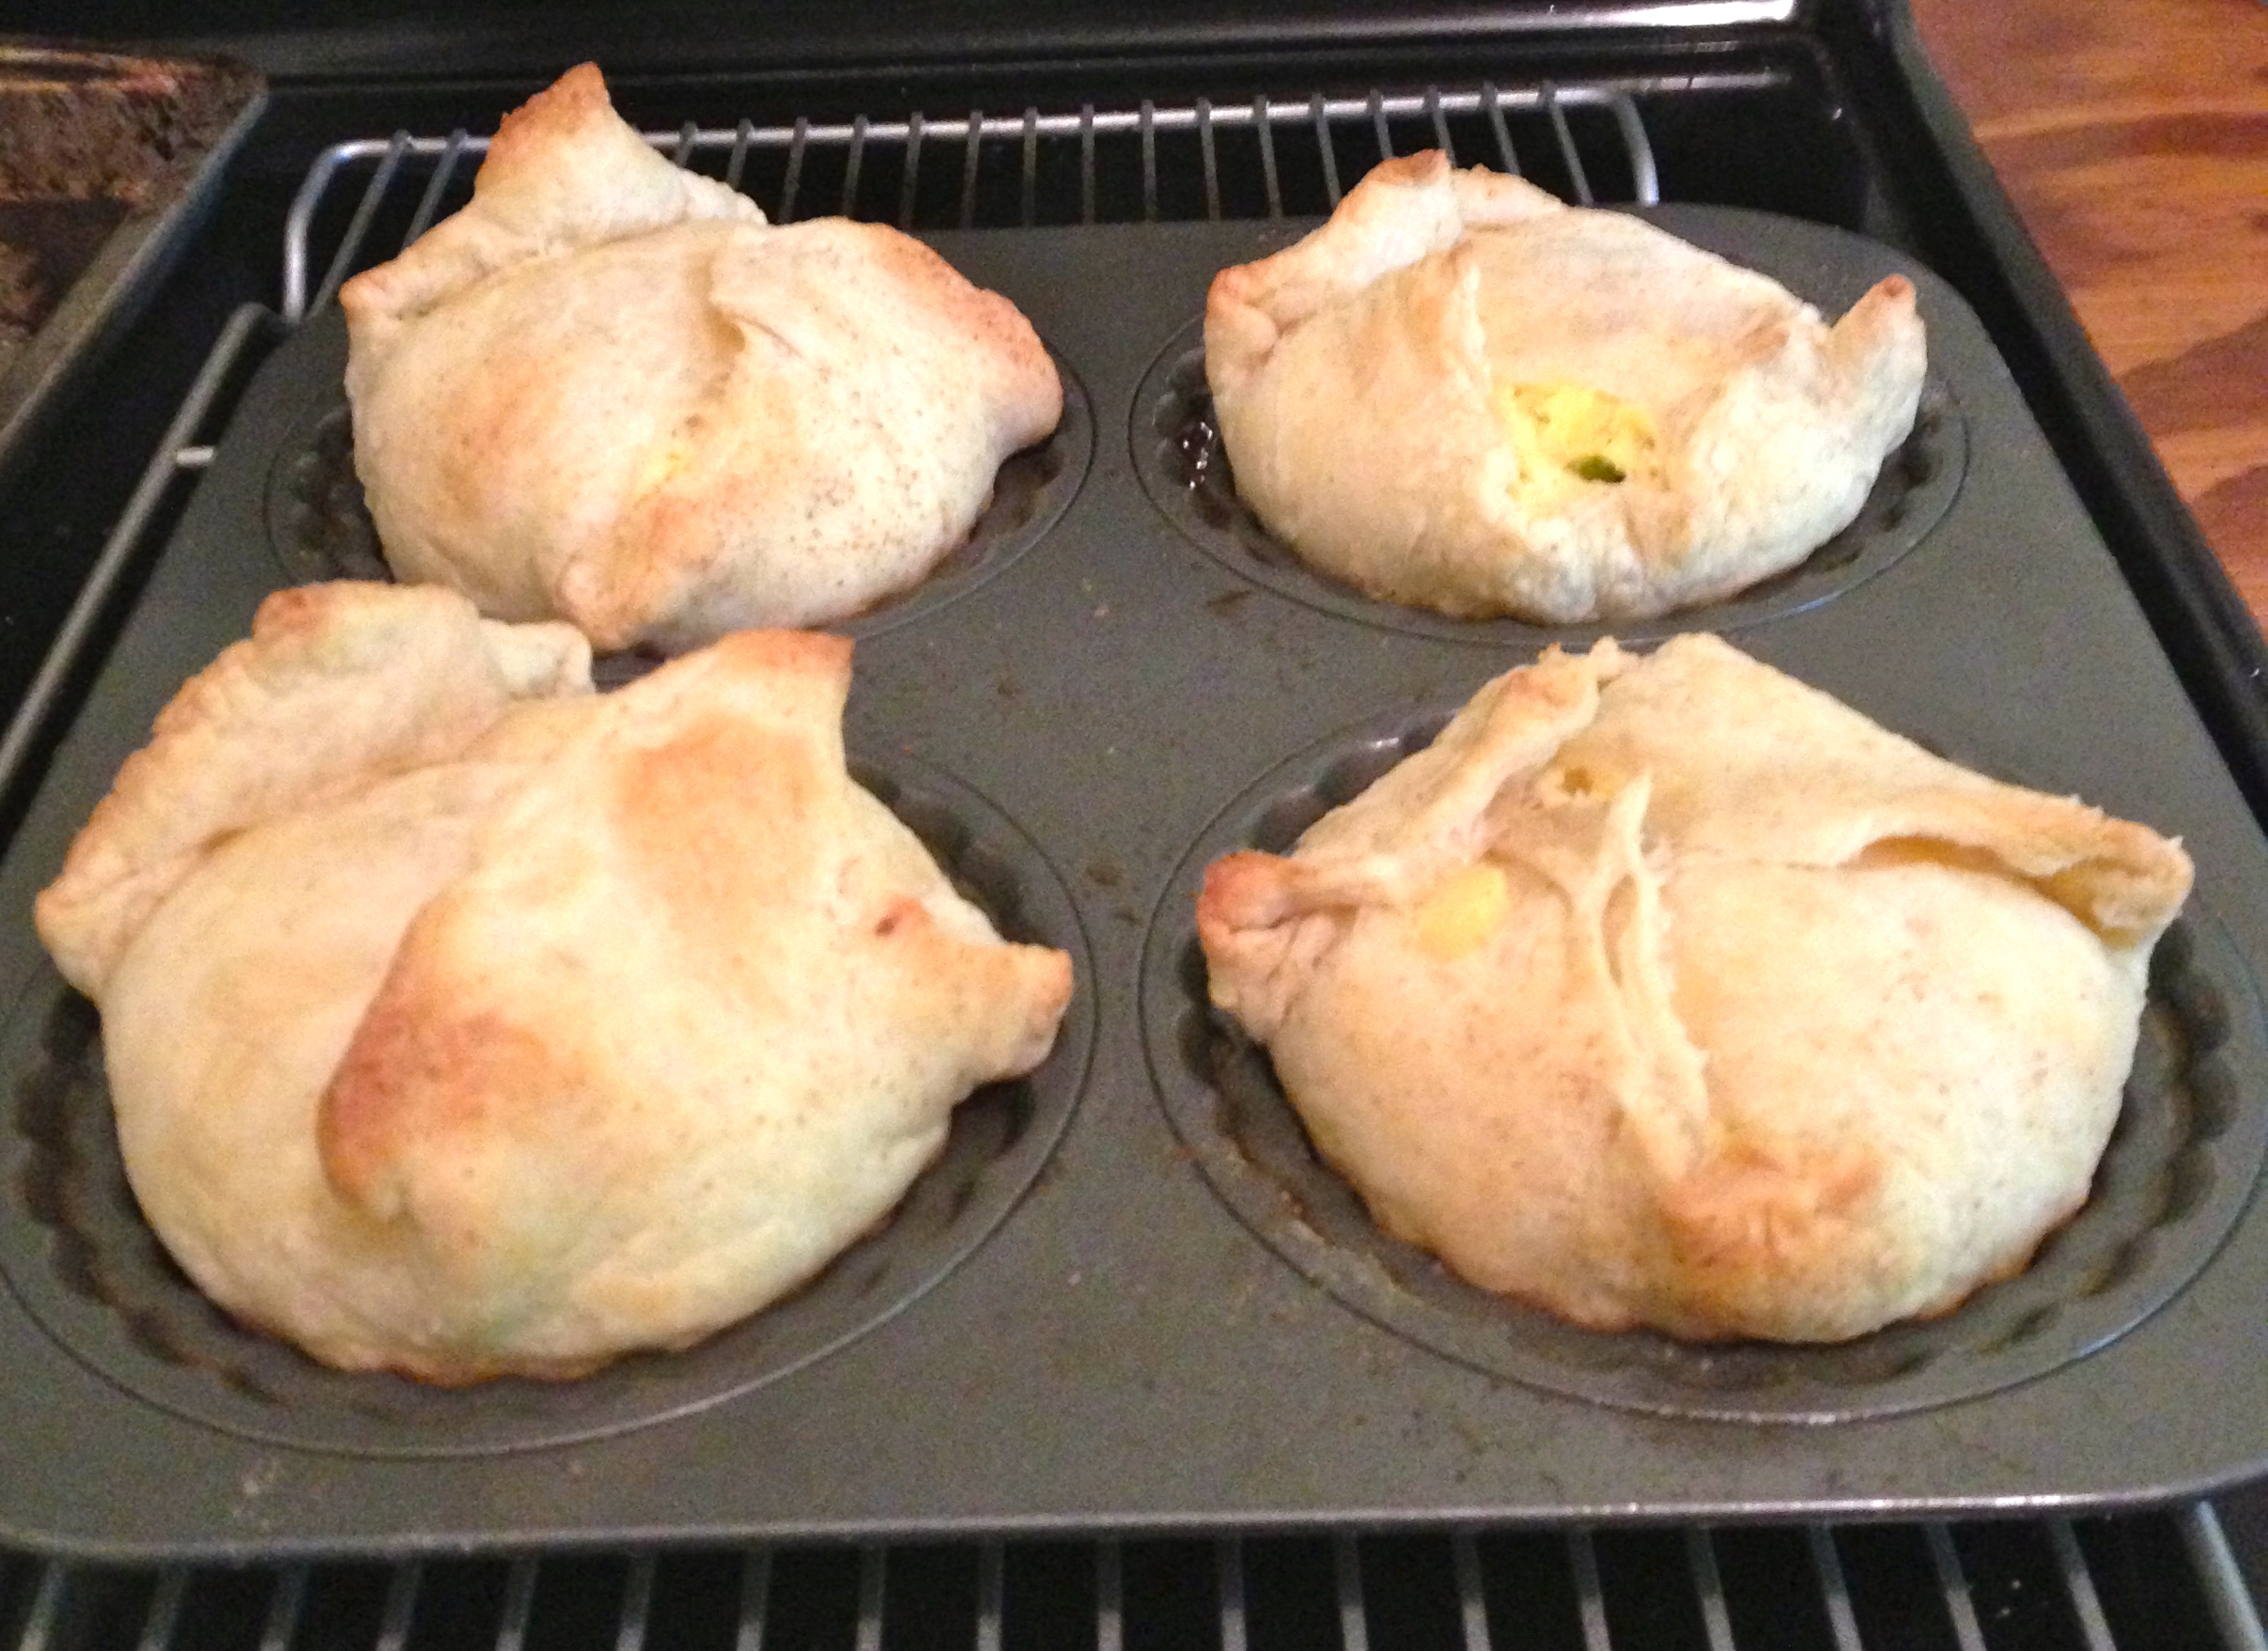
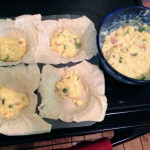
Panera Egg Souffle Knock Off
For two years in a row, Christian (new comedy special debuts 4.15.14!) and I haven’t swapped gifts in the traditional sense. But last year he did get me a rolling pin and this year the Chicago Metallic Pie Mold I’d been dreaming of. (Update: that pie mold is no longer sold, but here’s a link to a set of 4 individual pans.)If you’d told the 20-something-year-old me I would’ve wanted these as gifts, I would’ve beaten you with said rolling pin and made a nice meat pie out of your innards to bake in my new pan. Lo! How times have changed.
In a recent post, I talked of my latest obsession is how to recreate Panera Bread’s yummy egg soufflés while at our cabin, since there is no Panera within a hundred miles or so.
I found a few knock-off recipes online and pulled the basic common elements and made my own. I’ve made ham & asiago, goat cheese & spinach, sausage and cheddar, and cheese blends with and without onions & jalapeños. They were all amazing! Since Christian doesn’t like eggs, I made a few with just sausage, onion and cheese for a hearty meat pie.
Ingredients
1 8-ounce tube Pillsbury Crescent Roll Dough (I suppose you could make your own dough. Go for it!)
7 eggs, 1 reserved*
4 tbsp of half & half (or 2 tbsp heavy cream & 2 tbsp of milk or half & half…really just 4 tbsp of whatever milk/cream concoction you want or have on hand.)
3/4 cup of shredded cheese (any flavor / mix of flavors you like)
1/2 teaspoon salt
1/2 cup of diced ham, sausage, or bacon or whatever meat or veggies** your little heart desires.UPDATE: I’ve used Pepperidge Farm’s puff pastry sheets for dough and like it much more. A little lighter & flakier and uses less dough for each pie.
Directions
— Preheat oven to 375F. or 400F if you’re using puff pastry— Unroll the crescent dough but do not separate the pairs of triangles. Instead, pinch along the perforated seam so the 2 triangles become a square of dough. So you’ll wind up with four (4) squares. Roll out each square of dough a couple of times to make a 6″ x 6″-ish square. (For puff pastry, 1/3 of a sheet rolled out & cut in half makes two pies.)
— I spray the pan with non-stick spray and put one square of dough in each compartment.
— Mix 6 eggs, milk, and heavy cream in a microwavable bowl. Egg yolks should be completely broken and mixed in. Add shredded cheese and salt and mix again.
— Microwave the egg mixture in 30 second increments on high, stirring after each increment until you have a sort of solid, slightly runny scrambled egg mixture. (About 4 times-ish in a 1,000-watt microwave.)
Basically you’re cooking the eggs just enough so the dough at the bottom will cook, and the dough at the sides and top won’t fall in.
— Stir in your meat or veggies. For veggies, I sauté them a bit before adding.
— Fill each pie with your mix.
— Fold dough over the egg mixture.
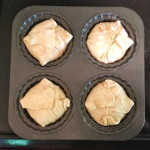
* Optional – Break and whisk the remaining egg and brush over dough before popping it into the oven. This makes the dough brown to shiny, golden color. Pretty and makes it look “done”, but totally not necessary. So if you wanna save an egg and aren’t trying to impress anyone, feel free to skip this. I’ve included photos of what the difference looks like below.
— Bake for about 20 minutes (15 for puff pastry) and then it’s bon appetit time!
**I made a spinach and goat cheese soufflé and added both ingredients after the microwave process.
Pictured from L to R:
Puff pastry after baking with no egg wash,
Crescent rolls with egg wash (egg soufflés in top pans and chicken pot pies in lower ones),
Christian enjoys his sausage, onion and cheese concoction, and
A cross section of his meat pie. Heh. -
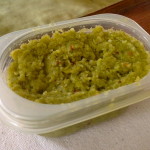
Holy Guacamole!
I made some out of this world guacamole using a recipe I found online and tweaked a bit. It’s so, so good I wanted you to have it. Hey, why not pair it with my Chicken Tortilla Soup!
- 3 avocados
- 1 lime, juiced
- 1/2 teaspoon salt
- 1/2 teaspoon ground cumin
- 1/2 teaspoon cayenne
- 1/2 medium red onion, diced

- 1/2 jalapeno pepper, seeded and minced. But I actually use the equivalent of one small Jalapeño pepper from a jar because my hillbilly grocer never has fresh japs.
- 1 medium tomato, seeded and diced
- 1 tablespoon chopped cilantro
- 1 teaspoon of minced garlic (or one clove if you’re mincing it yourself, which I don’t know why you’d do that!)
In a large bowl place the peeled, seeded and scooped avocado and lime juice. Toss to coat. Drain, and reserve the lime juice, after all of the avocados have been coated. Using a potato masher add the salt, cumin, and cayenne and mash. Then, fold in the onions, jalapeno, tomatoes, cilantro, and garlic. Add 1 tablespoon of the reserved lime juice. Let sit at room temperature for 1 hour and then serve. Enyoy!
-
Forget Spinach! Try Watergate Salad!

You’re thinking, “It’s Thanksgiving eve, shops have run out of Twinkies and the eBay price gouging has me down. What’s a girl to do?”
Or, maybe you’re wondering, “What can I fill my plate with that has the word salad in it but isn’t salad because GROSS? Who wants healthy stuff on Thanksgiving?!”
Never fear! Watergate Salad is here!
It’s a salad and a dessert. It’s green but sweet. And it has all the nutrients you’ll miss after suffering from Twinkie Shock Syndrome.
Hifalutin types probably think any dessert with main ingredients of Cool Whip or Jell-O is low class. And they’d be right. But they’d also be missing out on the glory that is Watergate Salad. It’s so easy to make, I assigned it as a task for Christian nine years ago on our first Thanksgiving. (Read that blog entry here. The fluffy, white-looking stuff on our plate is the salad. In real life, it’s mint green. I’ll add a new photo of mine when I make it in the morning.)
He didn’t own a bowl back then so, yeah, it was like telling a ring bearer to go count the number of flowers in a church during a wedding to make him feel important and keep him out of the way. (Sorry, Christian. It’s time I told you the truth.)
Okay, back to the “salad”. Here’s what you need:
1 8oz crushed pineapple
1 box instant pistachio pudding
1 cup miniature marshmallows
1 cup chopped pecans
1 9oz cool whipHere’s what you do:
Mix pineapple and pudding mix first then stir in other ingredients. Let it set in the fridge until you’re ready to stuff your face. It gets better with age, so if you have the time make it a day or two in advance. Put down the remote and make it already!
Bone apatitty!
-
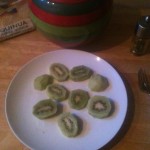
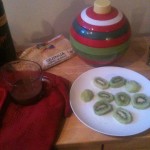
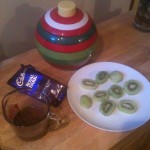
Frozen Chocolate Treats
You guys. Seriously. Try this. Here’s whatcha wanna do:
Get some fruit. Freeze it. Dunk it in some melted chocolate & coconut oil. Lick off all the chocolate that has “accidentally” dripped everywhere. “Clean” the chocolate covered dish with your index finger. Lick. Repeat.
Okay, for real, here are the uber-simple instructions:
— Stick a plate of fruit (sliced if needed like in the case of kiwis, bananas and such) in the freezer for an hour.
— Melt 1 bar of dark chocolate and a tbsp of coconut oil. (For the dark chocolate bar, use Hershey’s or Cadbury or the like. I’ve tried fancy stuff like Jacques Torres with yucky results. A larger 3.5 oz bar is perfect. Save a square or four to pop in your mouth while working and it’ll still be fine.)
— Once melted and blended, let it cool to room temperature. (I never have patience for this with fine results. That said, there’s always a surplus of oil at top and chocolate at bottom, so maybe I should wait next time.)
— Plunk the frozen fruit in the melted mixture using a popsicle stick, toothpick or, in the case of my raspberries, a skewer.Because the fruit is frozen & the plate chilled, the chocolate will dry quickly so it’s not even that messy and it’s MMM…MMM….GOOOOOOD!
Refrigerate or re-freeze the final product. I prefer them chilled in the fridge rather than frozen solid because, ouch, my teeth!
*For larger servings, keep this ratio: 1 tablespoon coconut oil for every 1/4 cup dark chocolate. Also, if you’re not a coco-nut (heh) use a refined coconut oil. Also, I use sugar free chocolate because sugar is the devil.
All in all, it’s a quick, easy, affordable, delicious, healthy treat. Basically, you’re gonna want to invite me to your parties so I can treat you to some chocolate covered fruits.


-
Easy Chili
Not wanting to make a trip into town for supplies, I made chili with stuff I had around the cabin. Writing it down for future use as it was super easy and MMM, MMM GOOD!
* 1 pound of ground beef or turkey
* 3/4 cup diced red onion
* 4 heaping tablespoons of Mrs. Renfro’s Green Salsa
* 2 teaspoons of chili powder
* 1.5 teaspoons cumin
* 1 jalapeño diced (I chopped up a heaping tablespoon of canned, sliced ones because I didn’t have a fresh jap.)
* 1 green bell pepper diced
* 1 can beans drained (We had a can of red kidney beans which is optional, of course, as is everything else.)
* 1 & a 1/2 tomatoes (just what I had…mix and match with diced tomatoes and tomato sauce based on what’s in the cupboard.)
* 22 oz of tomato sauce (I had a 14 oz and 8 oz can in the cupboard so used what I had)
* 8 oz water (I filled the empty 8 oz can of tomato sauce but didn’t need to.)Brown the ground beef in a pan then add to the crockpot with the other ingredients. I actually sautéed the onion & green pepper with the beef because I thought we’d be eating it in about 2 hours. Ended up cooking it on high for about 4 hours.
Topped it off with shredded cheddar cheese, a dollop of sour cream and some crushed tortilla chips. Delicious and easy and cheap!
-
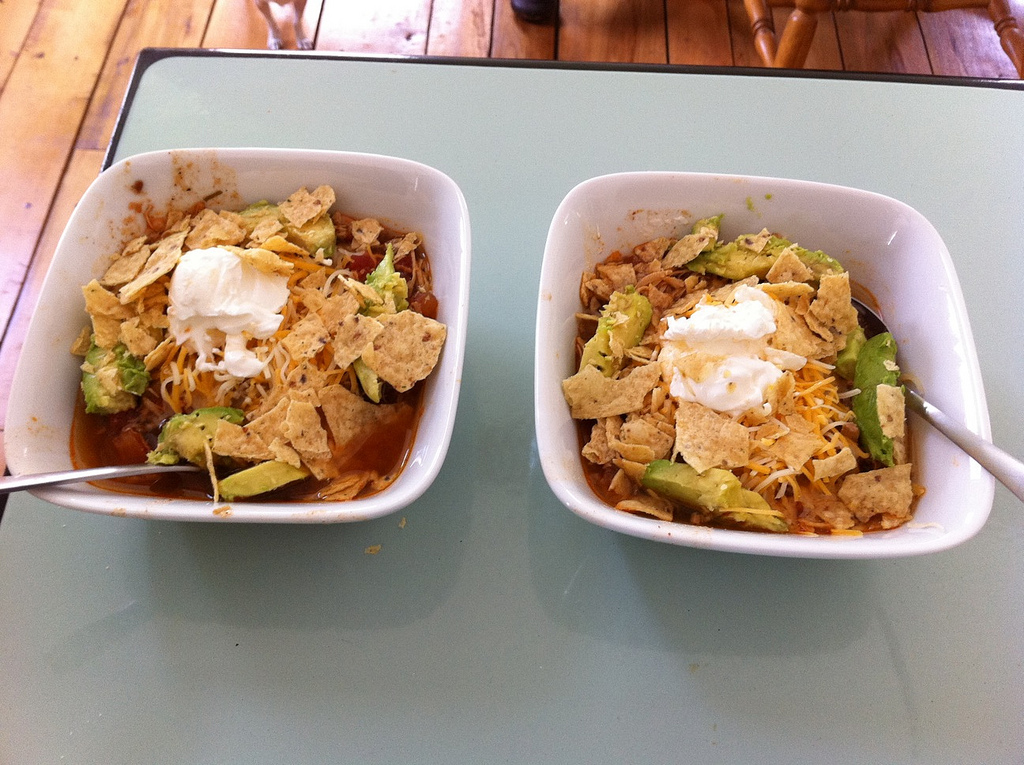
Chicken Tortilla Soup Recipe
 Okay, I found my Chicken Tortilla Soup recipe mentioned in my blog entry that will improve your sex life, make you lose weight & become rich & famous*.
2 large chicken breasts (1 lb or slightly more)
2 cans of chicken broth
1 fresh jalapeno sliced or 2 tbsp pickled jalapeños or substitute 2 heaping tablespoons of Mrs. Renfro’s** jalapeños
2 chili peppers diced (I never can find fresh chili peppers in the store so either skip this or throw in a few extra jap slices)
3/4 cups of diced red onion
2 extra large tomatoes diced OR two 15 oz cans of diced tomatoes
2 garlic cloves minced (or 1/4 teaspoon if from a jar)
2 tablespoons cilantro minced (Dang, I love cilantro. My tablespoons are heaping!)
1 tablespoon chili powder
2 teaspoons cumin
2 teaspoons pepper
1 teaspoon salt
2 teaspoons tobascoPut chicken in bottom of crock pot and pour in all the other ingredients.
For super tender chicken that shreds easily, cook on low for 8 hours. If you don’t have the time, cook 4 hours on high.
Garnish = tortilla chips, sour cream, shredded cheese and sliced avocado.
Hold on to your wig, otherwise it will be blown back by how yummy this is.
—Kambri
*Results may vary. If these things don’t happen to you after eating this recipe, then it’s probably your own fault.
**She’s was a counselor at my high school in TX and Mrs. Renfro’s salsa & jalapeñosare delicious! COOL!
-
Pudding Pop!
My spontaneous purchase of popsicle makers resulted in this yummy treat. Sugar free chocolate pudding pops made with 1% milk and chopped up chunks of bananas and strawberries = DELICIOUSNESS WITHOUT GUILT!
-Kambri
An all AC/DC station for free on iTunes radio? Well, hello, Utopia. -
First Friday Roundup
Howdy, y’all! We’re expecting such a big crowd for the First Friday Roundup hosted by Tex in the City that I had to move it up into the main bar! Nice! From 6:30 – 8:00 we’ll be serving free Sauza Hernitos Pomegranate Margaritas & the famous Rope Burn shot created by Serena Bass (click here or on the photo for the recipe from Serena’s cook book). After 8:00, the Pom margaritas will only be $5!

There are other cheap drink specials, $4 draft beer, delicious food at a discount and down home hospitality will greet you at the door! We’ll sell raffle tickets for great prizes and the proceeds will go to a Texas theater student in need.FRIDAY, OCTOBER 3RD — FIRST FRIDAY ROUNDUP
6:30 – 9:00
Comix
353 W 14th Street
212.524.2500If you haven’t RSVPd, please do so ASAP by emailing me at kc@texinthecity.com