Firestarters & Cabin Bedroom Wall Before & After
For those of you with high testosterone levels, move along, there’s nothing to see here but more crafty, decoratey stuff.
For the rest of you, here’s an update to my earlier post about my Mason jar addiction.
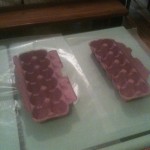
It’s August, which in the Catskills means it’s campfire season! We had our first last night in the fire pit on our patio to keep us warm while we watched two episodes of “The Wire”. Cozy toasty and the smell still lingers in Griswold‘s hair, just another reason to snuggle my nose behind his ear. Anyway, while starting the fire with soggy kindling and newspaper, I was reminded that I wanted to make my own fire starters. I’ve saved egg cartons and leftover wax from candles all spring and summer precisely for this reason. Fire starters can be pretty pricey and why let all that wax go to waste? Bonus: scented candle wax gives added aroma.
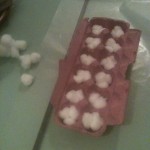
I stuffed cotton balls into the empty egg cartons, melted some wax (use leftover candles and Scentsy cubes that have lost their scent) in a makeshift double boiler (an empty can filled with the wax inside a pot of boiling water). Using a potholder & a pair of pliers to pluck the can out of the boiling water, I poured the melted wax over the cotton balls. Be sure to have wax paper under the cartons to save your counter, the wax will seep through. Use a toothpick to make sure the cotton soaks up the wax. Alternative materials to cotton balls are dryer lint and sawdust –they’re actually better but we don’t have a dryer or any sawdust piled up.
When we start our fire tomorrow night, I’ll cut off one “egg”, light the carton paper and see if my homemade starter worked. Supposedly they burn up to 10 to 15 minutes each, as long as, if not longer than a store-bought starter.
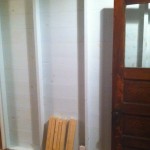
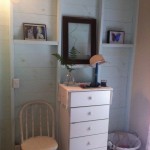
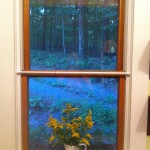
Now, onto the bedroom. The guy who restored the home from 2001-2007, didn’t put up drywall in the bedroom. It’s a style choice of his which we kind of like. We painted it a very light blue, but without drywall there’s no real way to hang anything. Then I had an idea! I got some 2x4s cut down to size which I painted & installed horizontally between the studs to create “shelves”. For extra security, I added a little “ledge” (like a dowel rod but not cylindrical) with some wood glue and two carpet nails. I thought it was a pretty good idea / solution. I placed some items on the ledges for picture purposes, but I’m not sure what will finally end up on the shelves. Whatdya think?
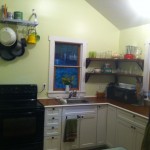
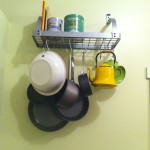
Update: I forgot to include pictures of our fresh coat of paint (Sassafras Tea) in the kitchen & dining room and the new pot rack for the we hung above the stove. (Thanks to my in-laws for my birthday gift card to Crate & Barrel to help pay for it!)
(Full Rock House photo set on Flickr.)